7 Easy Steps to Create a Support Ticketing System in WordPress (30 Minutes)
Providing exceptional customer support is vital for building trust and retaining customers. One of the best ways to streamline and manage customer service inquiries is by implementing a helpdesk system on your website.
If you’re running a WordPress site, you can easily create a support ticketing system using the Support Genix plugin, no coding required.
In this guide, we’ll walk you through seven easy steps to create a support ticketing system in WordPress using Support Genix. Whether you run an online store, SaaS platform, or service-based business, this setup can be done in just 30 minutes to improve customer communication and satisfaction.
Steps to Create a Support Ticketing System in WordPress with SupportGenix
Step 1: Install & Activate the Support Genix Plugin from WordPress Dashboard
To install directly from the WordPress dashboard, go to WordPress Dashboard > Plugins > Add New
Search “Support Genix”.
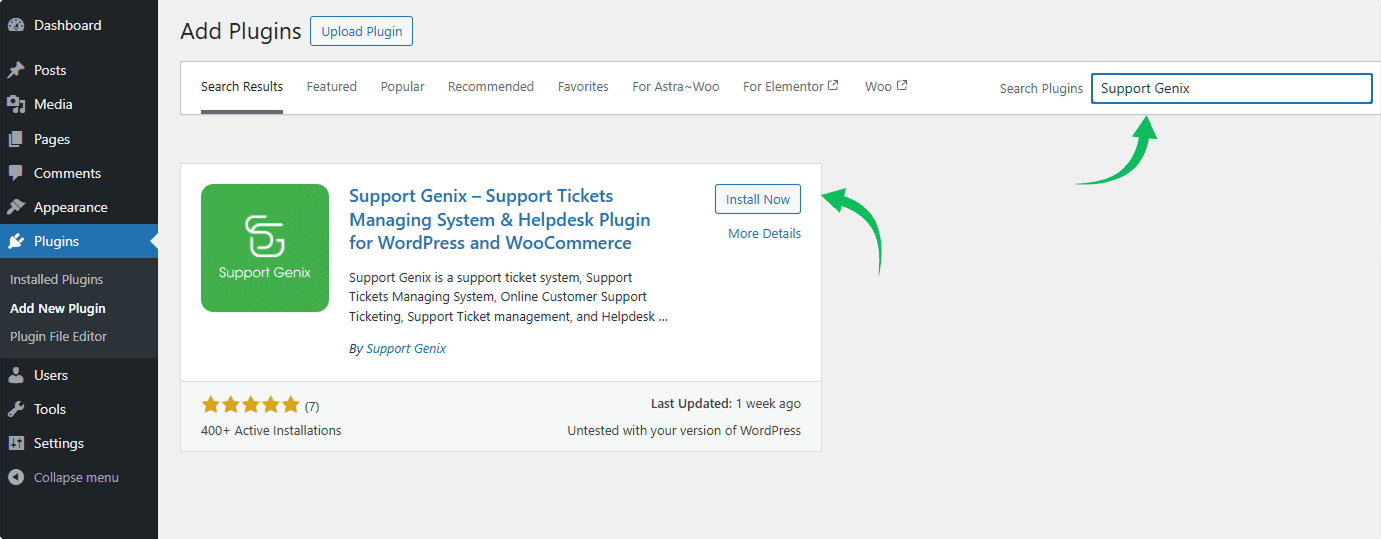
Thus, you can install and activate it right away. To use Pro Version, Go to the Pricing Page and purchase a license.
Alternative Way to Install Support Genix Plugin
You can download the Support Genix for free from WordPress repository. Visit the WordPress repository, search for the plugin and download it from there right away and take the next steps for installing and updating.
To install and activate the Support Genix plugin, follow these simple steps:
- Go to your WordPress dashboard.
- Navigate to the “Plugins” menu.
- Click on “Add New”.
- Choose the “Upload” option to upload the Support Genix plugin downloaded file.
- Click on the “Choose File” button and select the previously downloaded plugin file to your computer from WordPress repository.
- Once the file is selected, click on the “Install Now” button to initiate the installation process.
- After the installation is complete, click on the “Activate” button to activate the Support Genix plugin.
- You can now start exploring and utilizing the advanced functionalities of Support Genix to manage support tickets more efficiently.
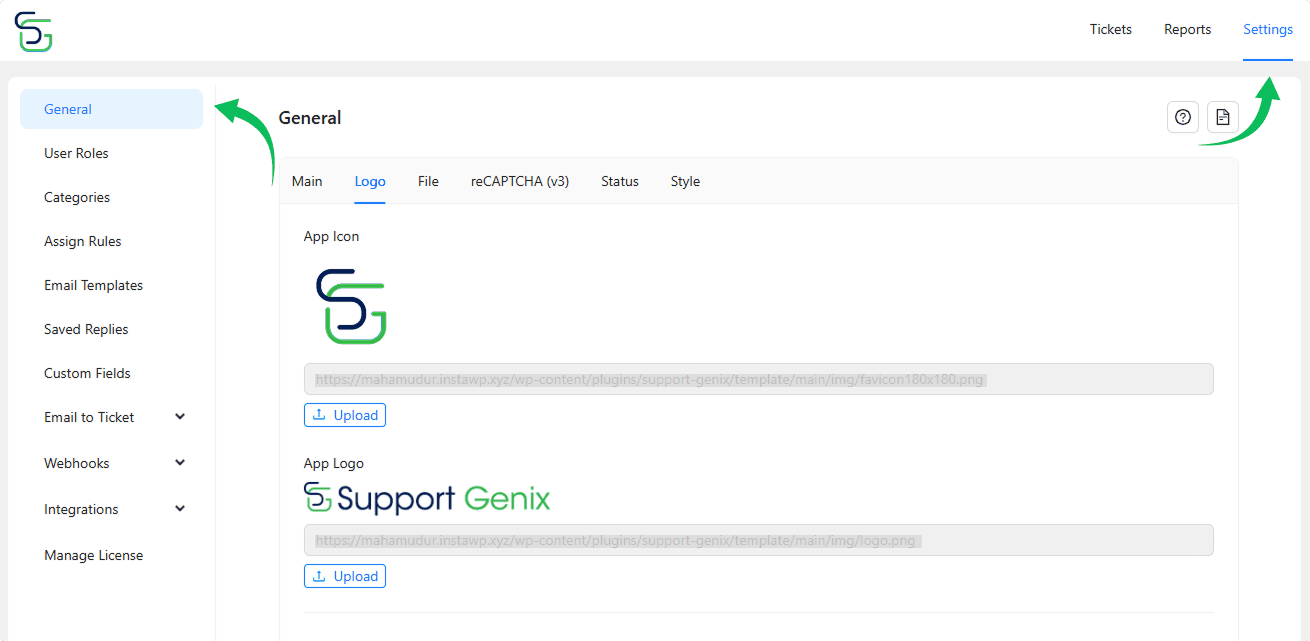
Step-2: Configure the Settings
After installing and activating the Support Genix plugin, a new menu will appear in your WordPress dashboard. By clicking on it, you’ll be taken to the plugin’s dedicated dashboard. From there, navigate to the Settings section to configure the basic options.
Within the settings, you have the flexibility to choose the specific page where you want to display the ticket functionality. Additionally, you can set the client role, and customize the client and registration page images, as well as the dashboard image.
Furthermore, you have the ability to set the Support logo and Favicon for a cohesive branding experience. The plugin also offers a range of toggle switches for customization. You can enable or disable various options such as the App loader, WordPress login/register, and WordPress profile link.
Additional settings include the public ticket option, registration form, showing other tickets on the Ticket Registration page, and hiding ticket details info by default, among others.
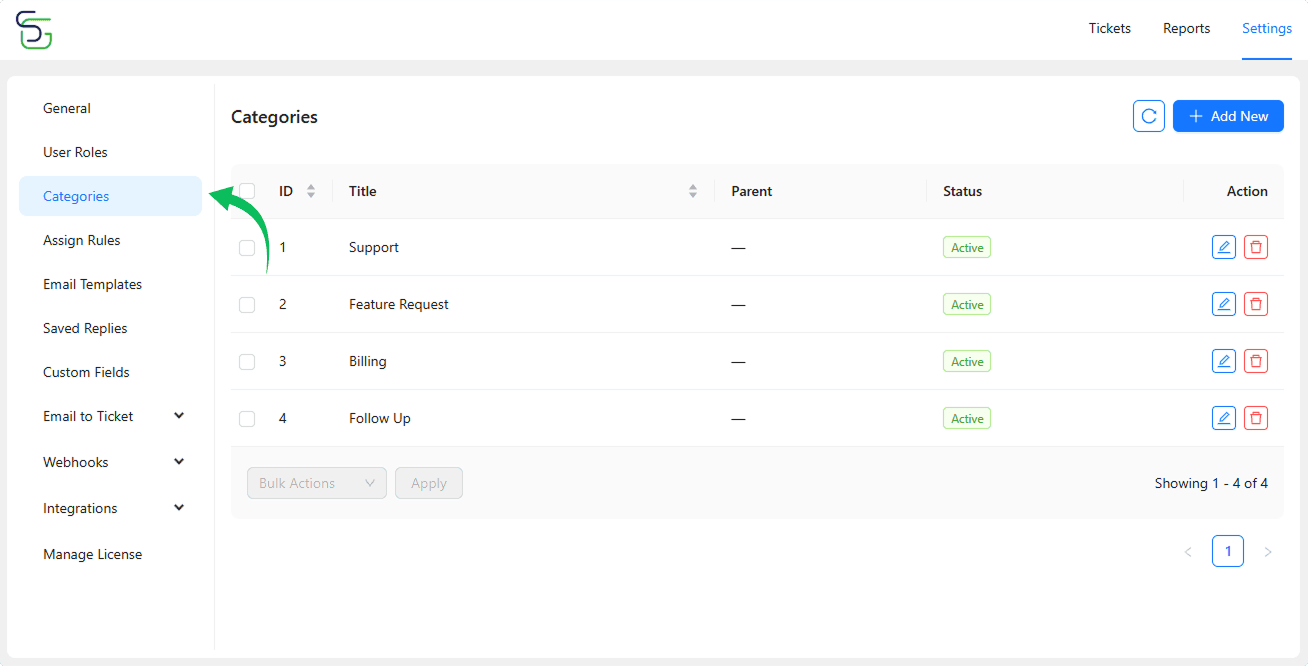
Step 3: Create Ticket Categories
Once you have successfully activated the Support Genix plugin, you will notice a new menu option called “Support Genix” in your WordPress dashboard. Navigate to the Support Genix Settings page to configure the plugin according to your needs.
On the settings page, you will have the option to create categories for your support tickets. This allows you to organize and categorize incoming tickets based on different topics or departments.
For example, you can create categories such as Support, Billing, Feature Request, Partnership, and more, depending on the specific needs of your business.
Step 4: Set Automatic Ticket Assign Rule
Within the Support Genix plugin, you have the option to configure auto ticket assign rules to streamline the ticket management process.
By accessing the “Assign Rule” tab in the plugin settings, you can define specific rules that will automatically assign and notify a support agent whenever a new ticket is generated.

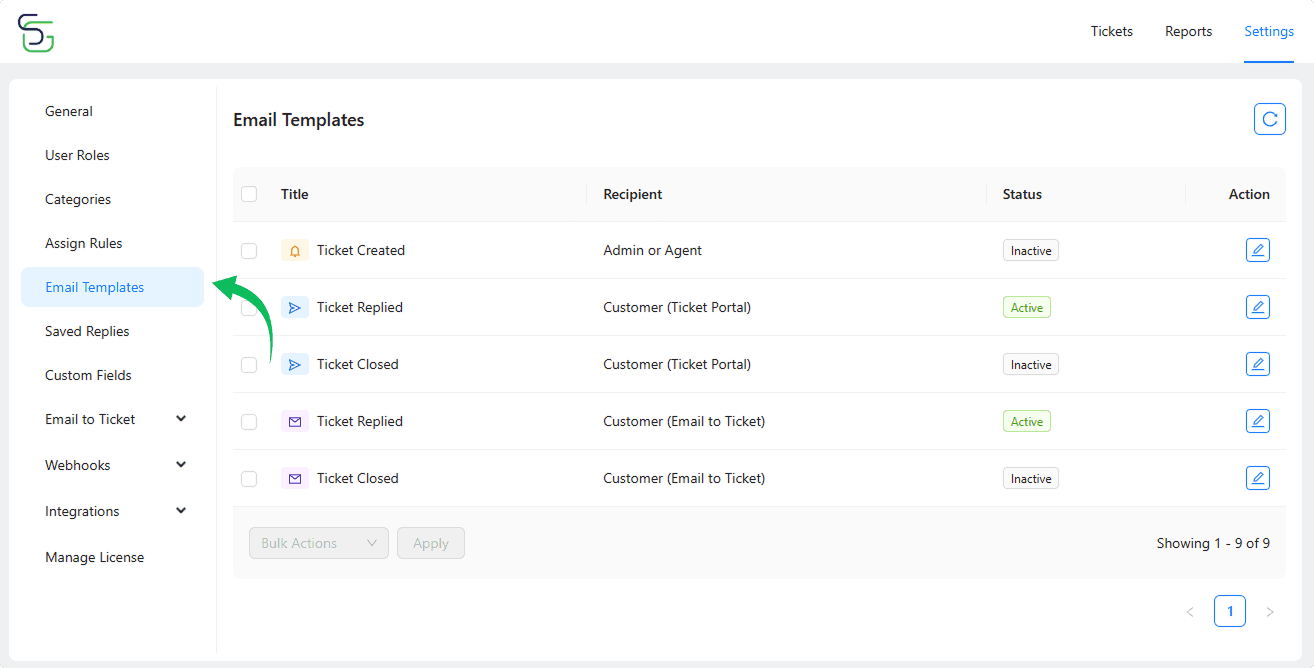
Step 5: Manage Email Templates for Customers and Agents.
By accessing the “Email Templates” tab in the plugin settings, you can easily customize and configure templates for various ticket-related actions such as ticket creation, ticket replies, and ticket closures.
Step 6: Manage Saved replies.
The Support Genix plugin includes a helpful feature called “Saved Replies” that allows you to save time and respond quickly to common inquiries. By accessing the “Saved Replies” tab in the plugin settings, you can create and store standard replies for frequently asked questions or common support scenarios.
Step 7: Create a Ticket page
To create a new page, navigate to Pages > Add New in your WordPress dashboard. Give the page a suitable title, such as “Ticket” or any preferred name. Afterward, access the SupportGenix settings by going to SupportGenix > Settings, and selecting the page you created for the ticketing functionality.
To Wrap Up
Implementing a ticketing system using SupportGenix can significantly improve your customer support process. With these seven easy steps, you can have a fully-functional ticketing system that streamlines your support requests and improves customer satisfaction.
SupportGenix plugin is designed to make the entire process more manageable, so don’t hesitate to try it out for your business today! By investing in your customer support, you not only build trust and loyalty among your clients but also set yourself up for long-term success.