Efficiently Manage Ticket Categories in Support Genix
Organize your support tickets effectively by establishing relevant categories like “Support,” “Billing,” “Feature Request,” or “PreSale Question.” Support Genix allows you to easily add, modify, delete, and manage ticket categories from your dashboard.
Benefits
✅ Simplify ticket management with structured categories.
✅ Quickly add, edit, or delete categories.
✅ Perform bulk actions like Activate, Deactivate, or Delete categories.
✅ Improve team efficiency with streamlined ticket workflows.
How to Use
Step 1. Access Ticket Categories
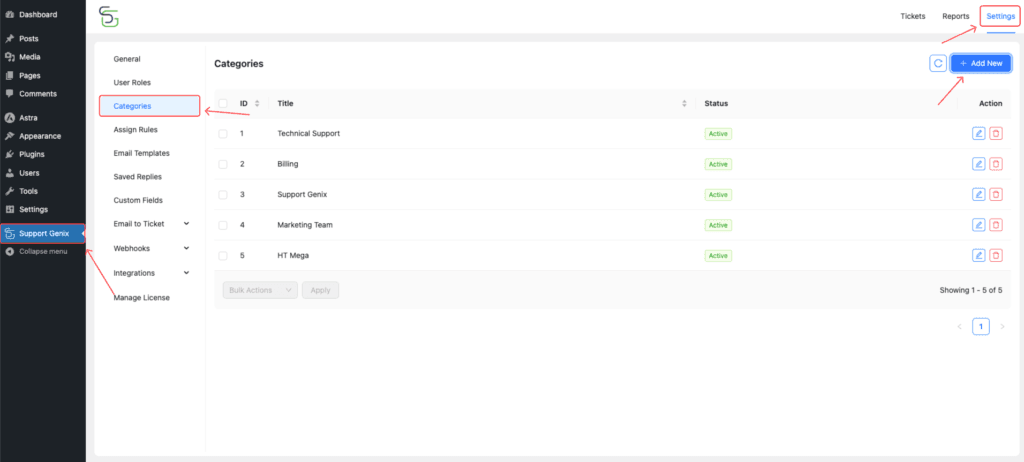
- Go to your WordPress Dashboard.
- Navigate to Support Genix > Settings > Categories.

Step 2: Add a New Category
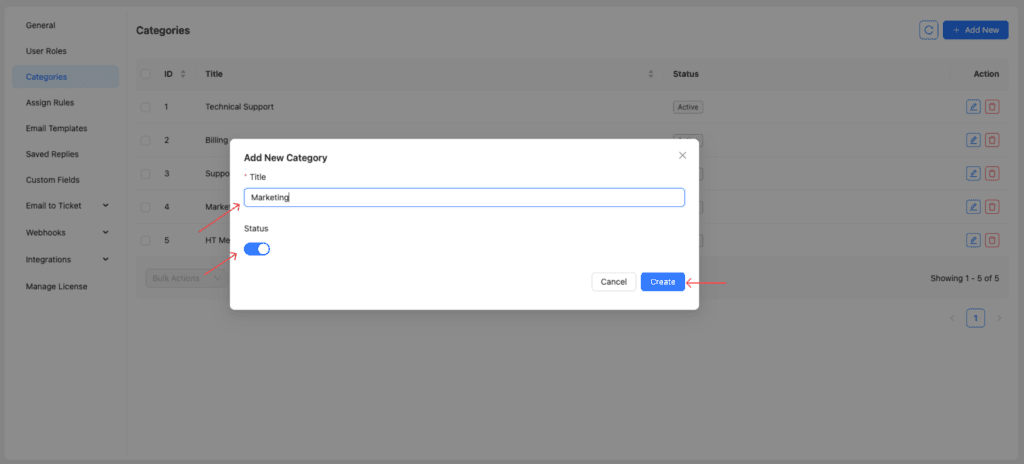
- Click on the “Add New” button.
- Fill out the following details:
- Category Title (e.g., Marketing, Billing).
- Set Status to ON to activate the category.
- Click “Create” to save the new category.

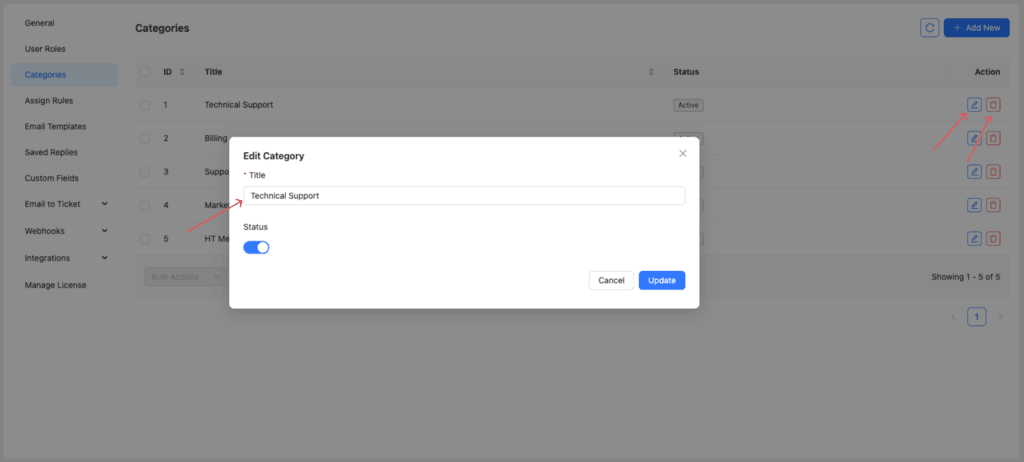
Step 3. Modify or Delete a Category
- To Edit: Click the Edit icon (pencil) to modify the category details.
- To Delete: Click the Delete icon (trash bin) to remove a category.

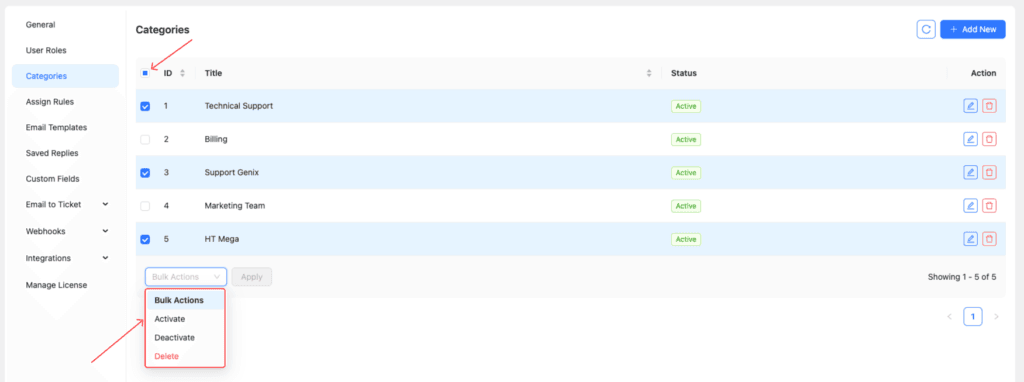
Step 4. Use Bulk Select and Actions
- Check multiple categories using the checkboxes.
- Select an action from the Bulk Actions dropdown:
- Activate
- Deactivate
- Delete
- Click “Apply” to execute the selected action.

Pro Tip💡
Learn how to automatically assign categories using Support Genix’s Ticket Assign Rules. Check out the full guide here: Ticket Assign Rule Documentation.
Last updated on October 8, 2025
