Create Support Agent in Support Genix
Creating Support Agents or Managers is essential to managing your support workflow efficiently. If you have multiple teams or departments, creating designated users with specific roles ensures seamless ticket management and enhanced productivity.
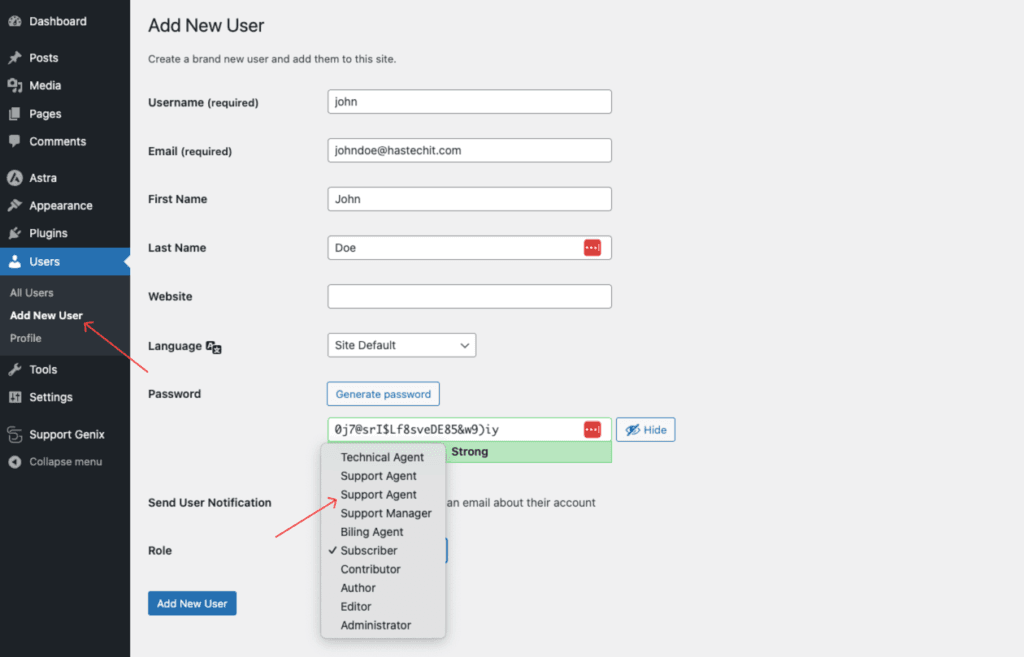
Step 1: Navigate to Add New User
- Log in to your WordPress Dashboard.
- Go to Users > Add New User.

This section includes all default WordPress user creation options.
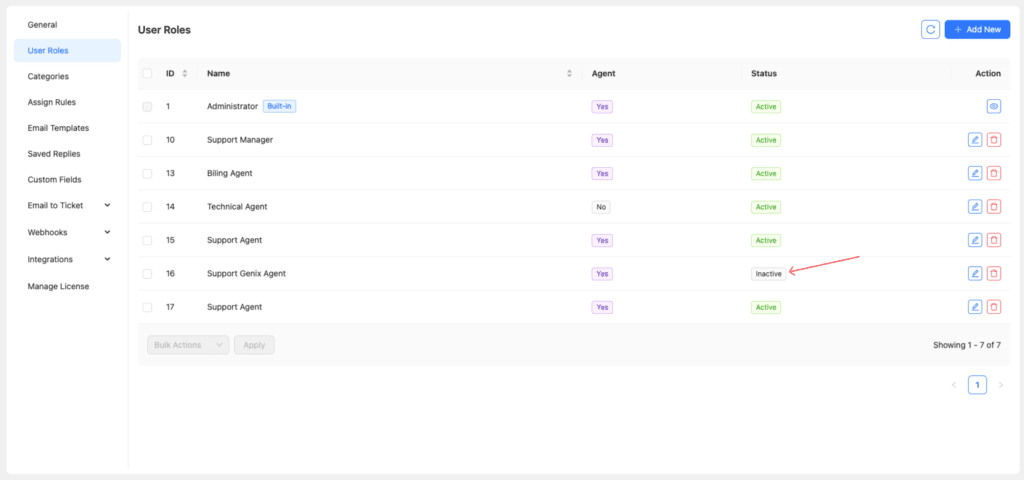
Note: If your role’s status is Inactive, it will not appear in the role selection dropdown.
Step 2: Ensure Role Status is Active
- Navigate to Support Genix > Settings > User Roles.
- Verify that the role you want to assign has an Active status.

If the role status is Inactive, you need to activate it to make it visible when creating a new user.
Why Creating Support Agents and Managers is Important?
- Streamlined Support 🔧: Assign roles to agents or managers to handle specific tasks or tickets.
- Team Collaboration 🤝: Distribute workload among support team members effectively.
- Role-Based Access 🔒: Limit permissions and ensure users access only what they need.
Conclusion
Creating support agents or managers in Support Genix is a simple process. By assigning roles to your team members, you can manage your support system more efficiently. Make sure to verify the role status before assigning it to avoid any issues.
Get started today and enhance your support workflow with Support Genix! 🚀