Manage and Customize Email Notifications/Templates in Support Genix
Email notifications are a crucial component of any support system. Support Genix offers beautiful and easy-to-customize email templates to ensure seamless communication between admins, agents, managers, and customers. You can tailor these templates to match your specific needs and preferences.
Benefits
✅ Pre-designed email templates for admins, agents, and customers.
✅ Customize email content, subject, and placeholders effortlessly.
✅ Enable/disable email templates based on your workflow.
✅ Perform bulk actions (Activate/Deactivate) for efficiency.
How to Use
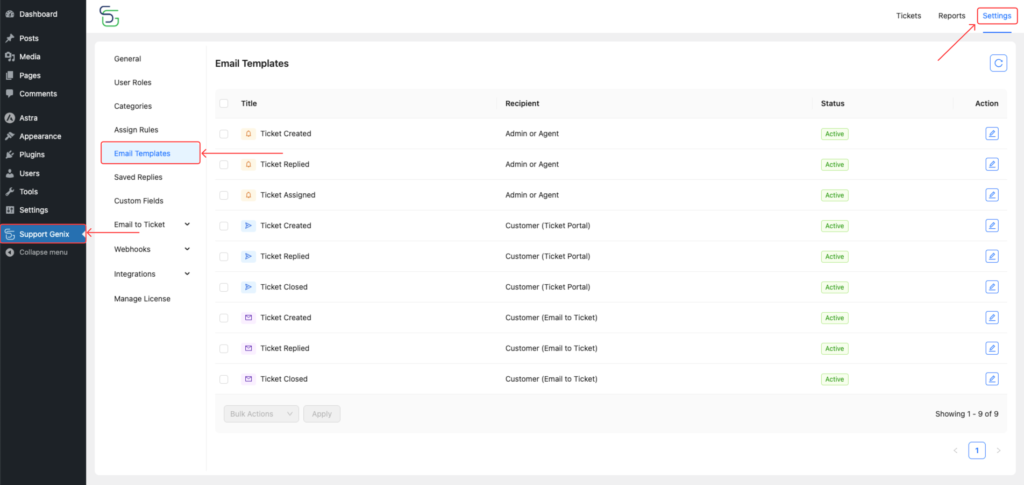
Step 1. Access Email Templates
- Go to your WordPress Dashboard.
- Navigate to Support Genix > Settings > Email Templates.
- You will see three types of email templates:
- For Admin, Support Agent, or Support Manager
- For Customers (Ticket Portal)
- For Customers (Email to Ticket)
Step 2. Edit or Modify Email Templates
- Click on the Edit icon next to the desired email template.
- A pop-up form will appear with the following fields:
- Subject: Customize the email subject line.
- Content: Modify the email body. Use dynamic placeholders for personalized content.
- Status: Toggle ON to activate or OFF to deactivate the template.
- After editing, click Update to save changes.
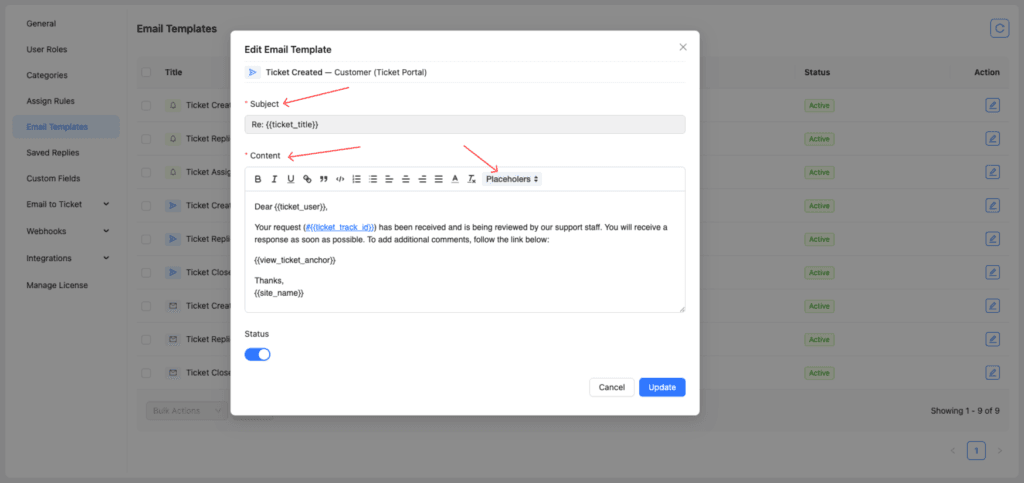
Step 3. Dynamic Placeholders
Support Genix provides dynamic placeholders to insert real-time data into your email templates. Below is the list of placeholders you can use:
{{site_name}}– Website name{{site_url}}– Website URL{{ticket_user}}– Ticket creator’s name{{ticket_replied_user}}– Last replied user’s name{{replied_text}}– Reply content{{ticket_link}}– Link to the ticket{{ticket_hotlink}}– Quick-access link{{view_ticket_anchor}}– View ticket button{{view_ticket_hot_anchor}}– Quick-access ticket button{{ticket_track_id}}– Ticket tracking ID{{ticket_title}}– Ticket title{{ticket_category_id}}– Category ID{{ticket_category_title}}– Category title{{ticket_body}}– Ticket description{{ticket_priroty}}– Ticket priority{{ticket_open_app_time}}– Ticket opening time{{custom_field__slug}}– Custom field data
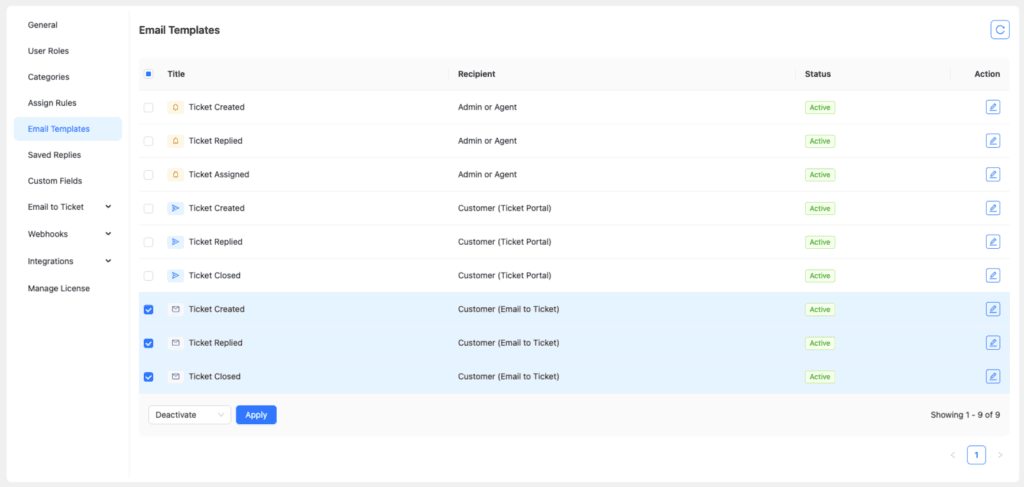
Step 4. Bulk Select and Action
- Select multiple email templates using the checkboxes.
- From the Bulk Actions dropdown, choose:
- Activate – Enable selected templates.
- Deactivate – Disable selected templates.
- Click Apply to execute the action.
For example, if you do not use the “Email to Ticket” method, you can deactivate its templates with bulk action.
Pro Tip💡
Customize email templates to align with your brand tone and style for better communication with customers and team members.
Last updated on March 15, 2026
Was this article helpful?
Powered by Support Genix