Envato Integration
Support Genix offers seamless integration with Envato for WordPress theme/plugin vendors. This feature allows vendors to verify purchase codes and ensure customers within the support period can submit support tickets. It simplifies ticket management and ensures only valid customers receive support. 🚀
Benefits of Envato Integration
- 📈 Streamlined Support Workflow: Automatically verify purchase codes to ensure valid customers submit requests.
- 😊 Enhanced Customer Experience: Prevents unauthorized support requests, maintaining service quality.
- ⏳ Support Period Validation: Ensures tickets are only created within the purchased support period.
- 🔒 Simplified Verification Process: Direct integration with Envato API for hassle-free verification.
- 📊 Efficient Management: Reduce manual work by automating purchase verification.
Step-by-Step Guide to Enable Envato Integration
Step 1: Navigate to Envato Integration Settings
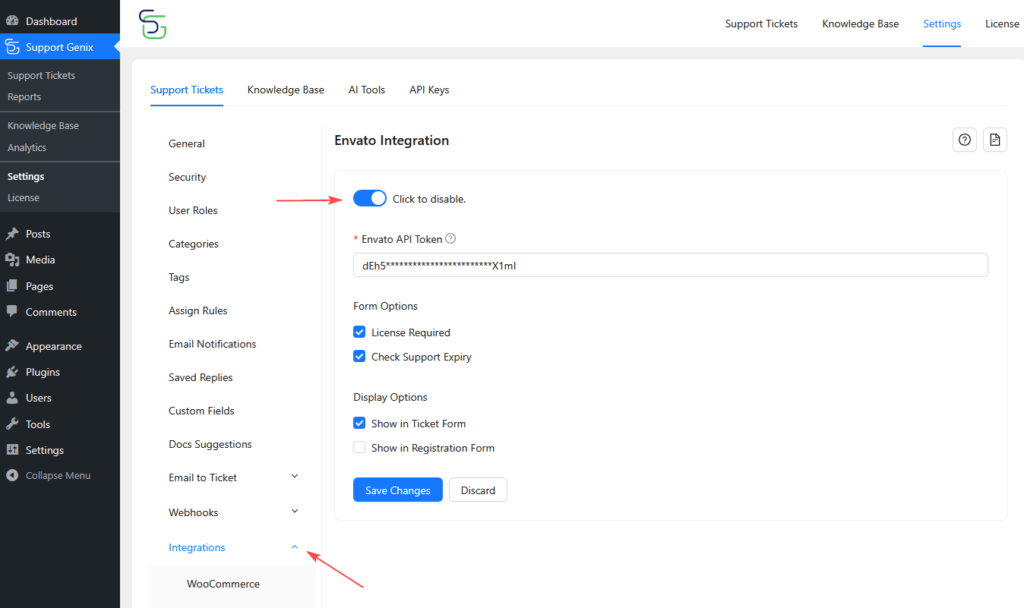
- Go to Support Genix > Settings > Integrations > Envato from the WordPress Dashboard.
- Toggle the Click to Enable switch.
Step 2: Create an Envato API Token
- Visit Envato API Website and sign in to your account.
- Navigate to My Apps and scroll to Your Personal Tokens.
- Click Create a new token and fill in the required form.
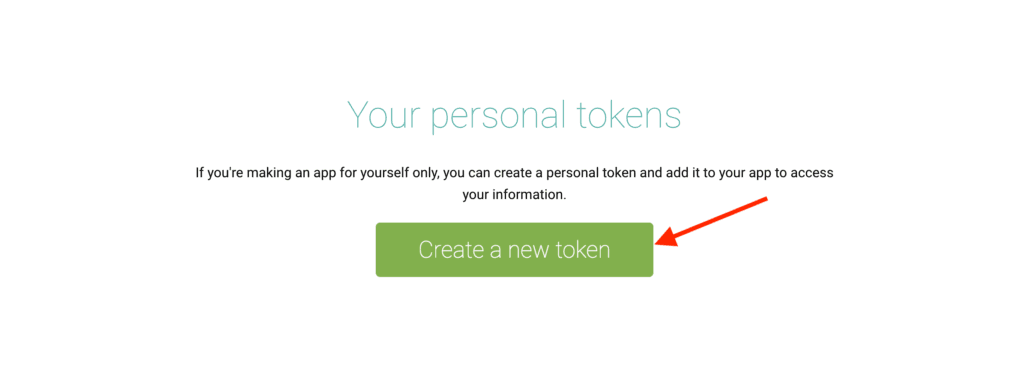
Permissions to select while creating the token:
- ✅ View and search Envato sites
- ✅ View the user’s Envato Account username
- ✅ View the user’s email address
- ✅ View the user’s account profile details
- ✅ View the user’s account financial history
- ✅ Download the user’s purchased items
- ✅ View the user’s items’ sales history
- ✅ Verify purchases of the user’s items
- ✅ List purchases the user has made
- ✅ Verify purchases the user has made
- ✅ View the user’s purchases of the app creator’s items
👉 For more details, refer to the document screenshots and attached files .

Step 3: Configure Support Genix with API Token
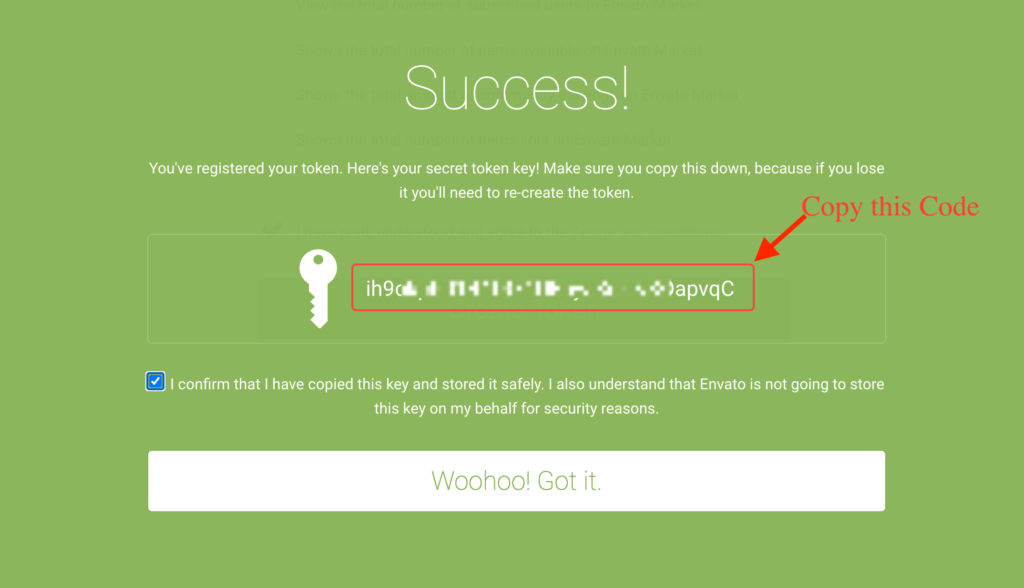
- Copy the generated API Token from Envato.
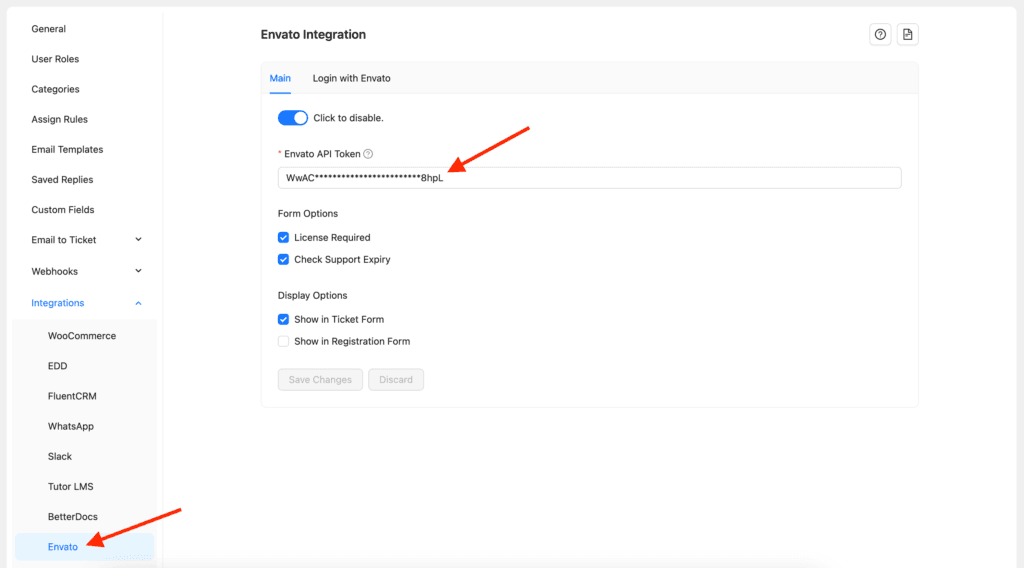
- Paste the token into the Envato API Token field in Support Genix > Settings > Integrations > Envato.
- Enable License Required and Check Support Expiry options for additional verification.
- Select whether the license field appears in Ticket Form or Registration Form.
Step 4: Login with Envato
Part 4.1: Open the Login with Envato Tab in Support Genix
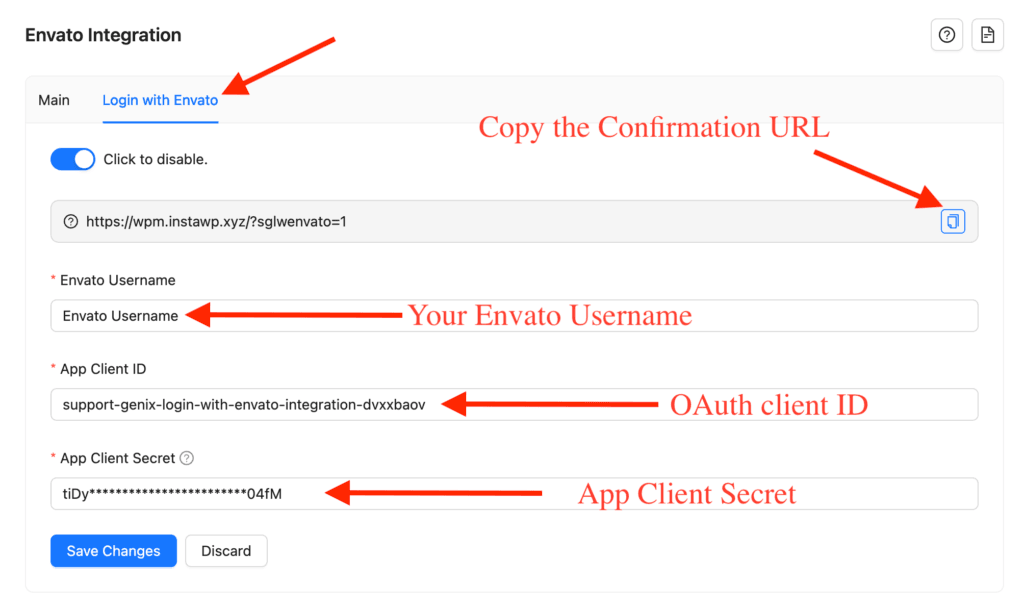
- Navigate to Support Genix > Settings > Integrations > Envato > Login with Envato
- Click on the Login with Envato tab.
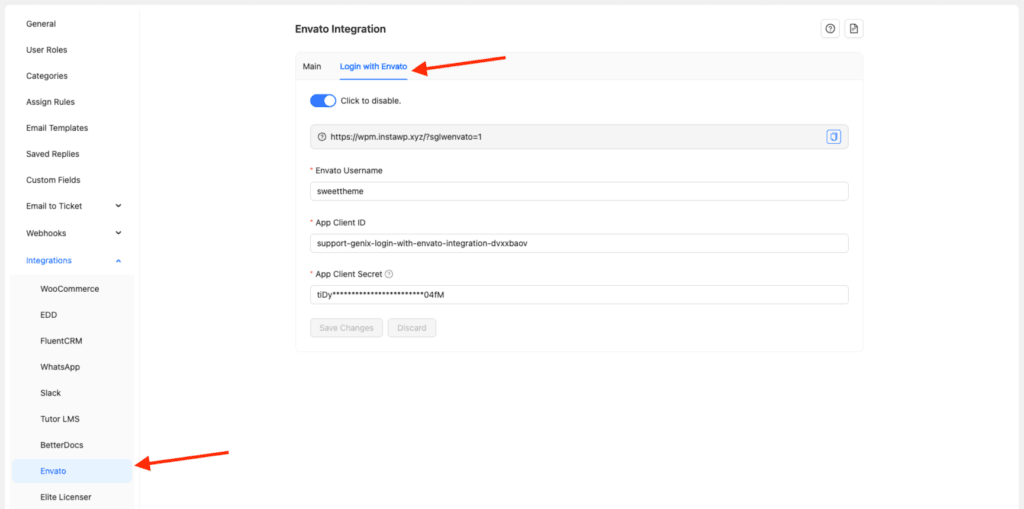
Part 4.2: Register a New App in Envato
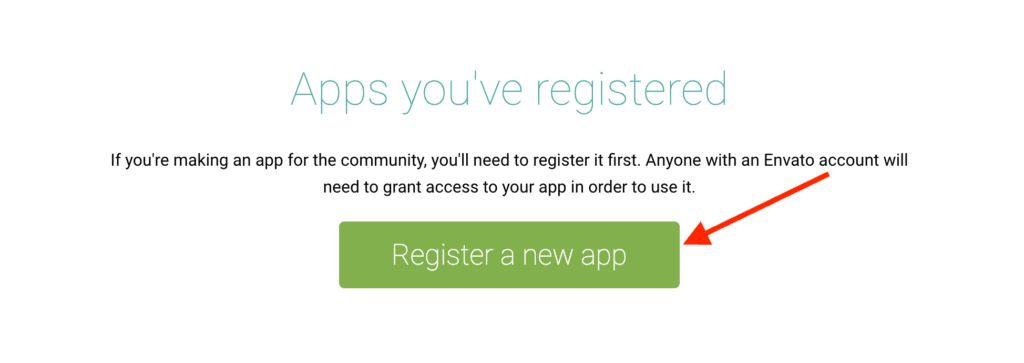
- Go to the Envato Build page and click on Register a New App.
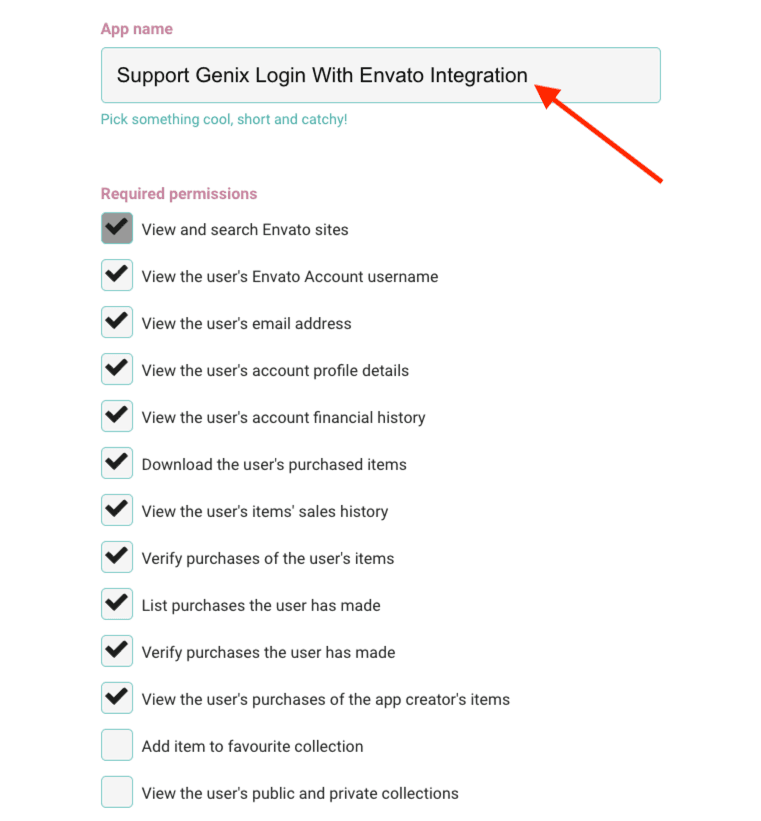
- Add your App Name and enable all the Required Permissions.
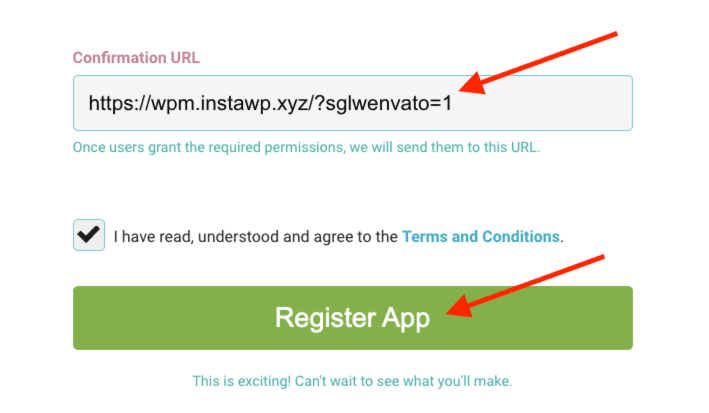
Part 4.3: Add Confirmation URL
- Copy the Confirmation URL from Support Genix and paste it into the app registration form in Envato.
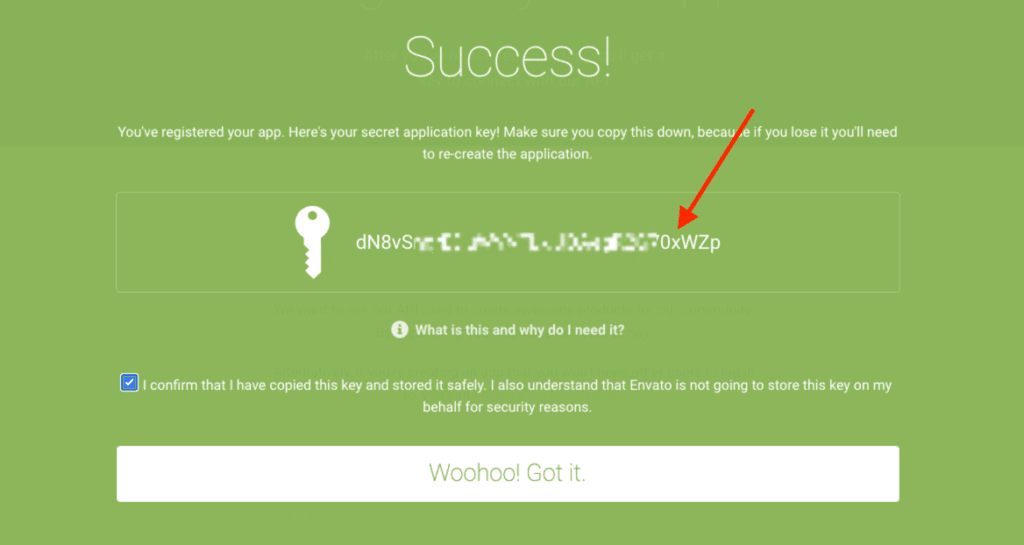
- After submitting, note down the App Client Secret displayed in the popup.
Part 4.4: Complete the Integration
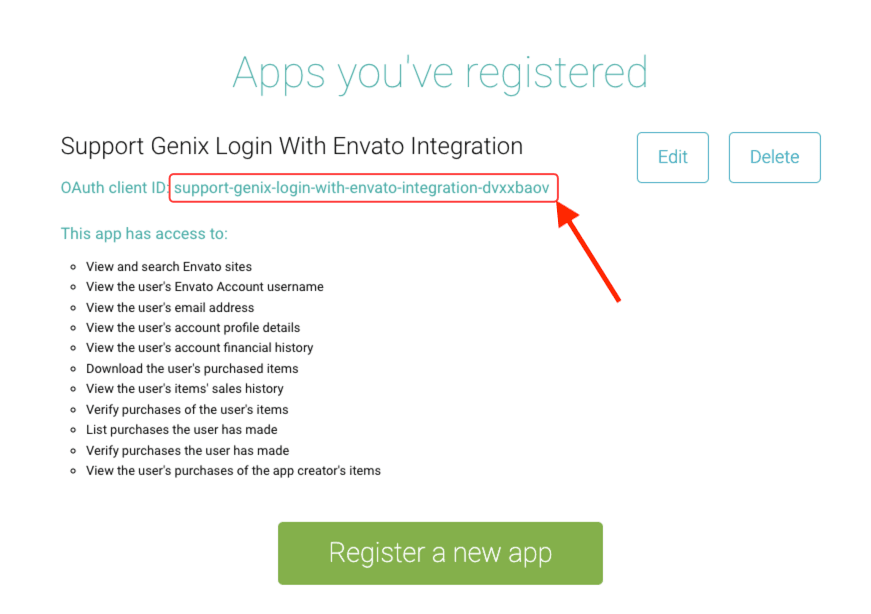
- Copy the OAuth Client ID from your registered app in Envato.
- Paste the OAuth Client ID and App Client Secret into the Support Genix Login with Envato settings.
- Enter your Envato Username and click Save Changes to finalize the integration.
🎉 Congratulations! Your Envato Integration setup is now complete. If you face any issues, our support team is ready to assist.
Notes
- Ensure all permissions are selected correctly while creating the API token to avoid integration issues.
- This integration requires a valid Envato account.
Last updated on December 21, 2025