How to install and activate Support Genix?
To get started with Support Genix, follow these steps for seamless installation and activation. Support Genix is a powerful WordPress support ticket plugin that helps you manage support requests efficiently.
Step 1: Purchase and Download the Plugin
Purchase the Plugin
- Go to our official website and purchase the Support Genix plugin.
Access the Client Portal
- After purchasing, you will receive login credentials for our client portal via email.
- Log in to the portal at https://portal.hasthemes.com/ using your credentials.
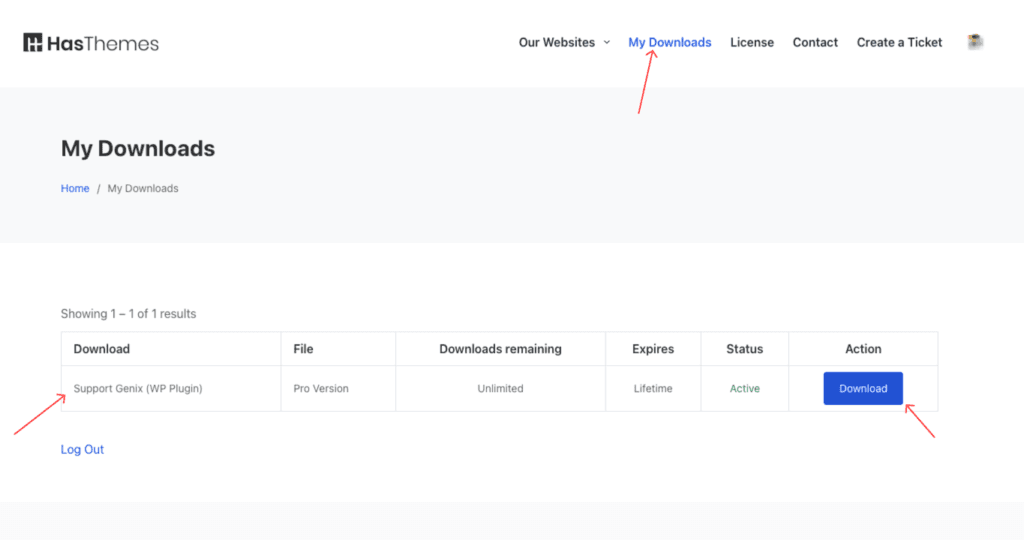
Download the Plugin File
- Navigate to the My Downloads menu.
- Click the Download button to retrieve the Support Genix plugin file.
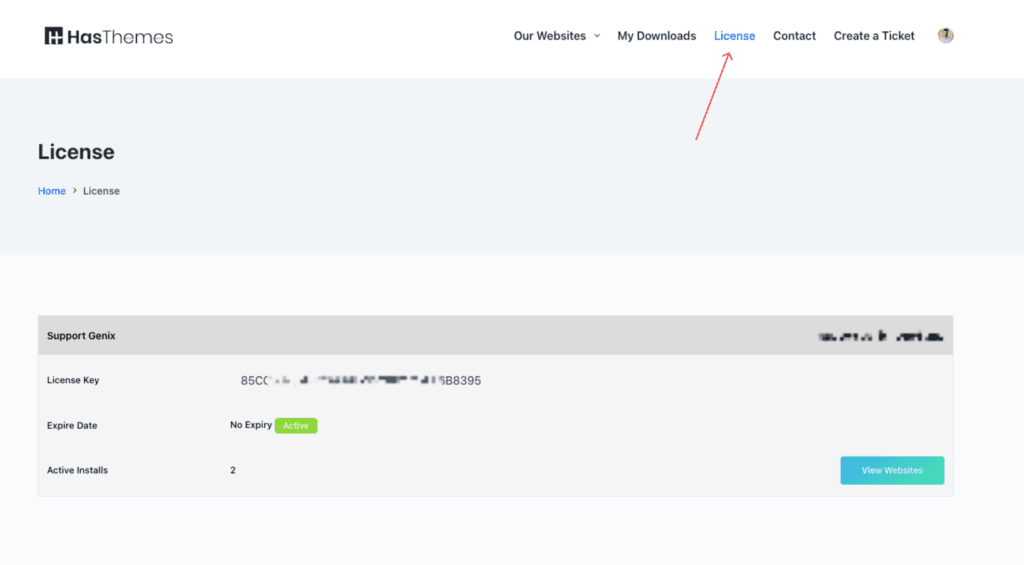
Access Your License Key
- Go to the License menu to find your plugin license key.
Step 2: Install the Plugin in WordPress
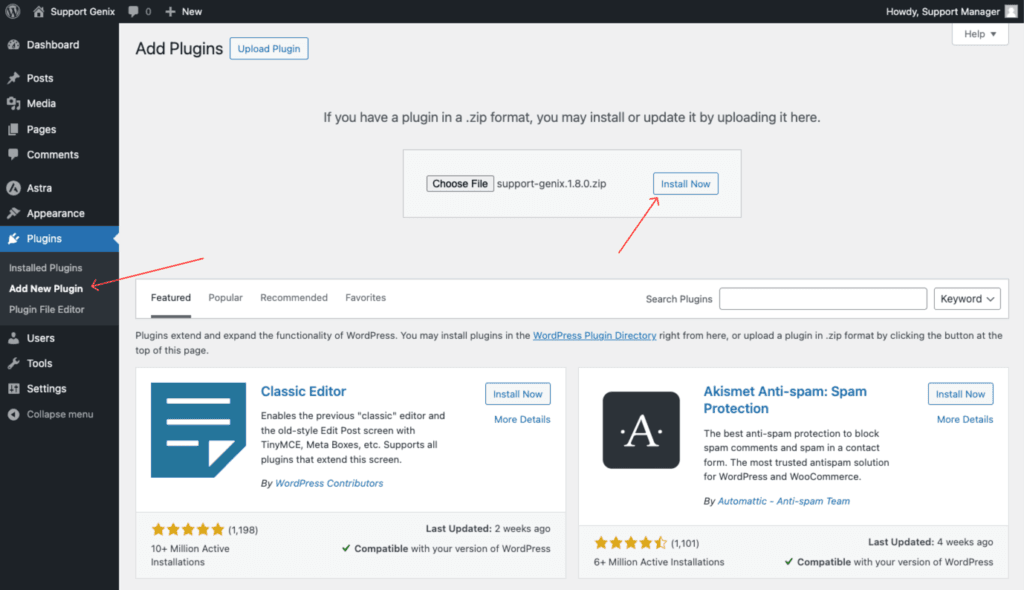
Navigate to Add Plugins
- Go to your WordPress Dashboard > Plugins > Add New.
- Click the Upload Plugin button.

Upload the Plugin
- Click Choose File, select the downloaded Support Genix ZIP file from your computer.
- Click the Install Now button.
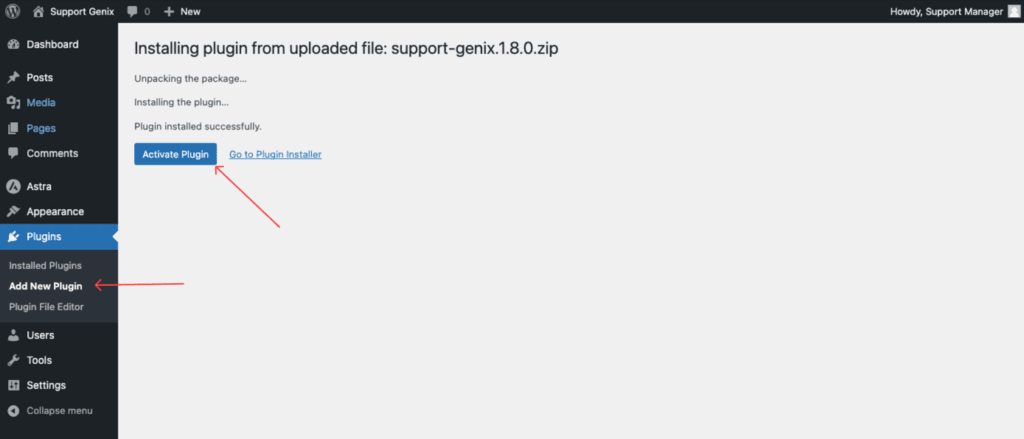
Activate the Plugin
- Once the installation is complete, click Activate Plugin to enable Support Genix.
Step 3: Activate the License
Navigate to License Activation
- Go to Support Genix > Settings > Manage License.
Enter Your License Key
- Copy the license key from the client portal under the License menu.
- Paste the license key into the License Code field.
- Enter your registered email address in the Email Address field.
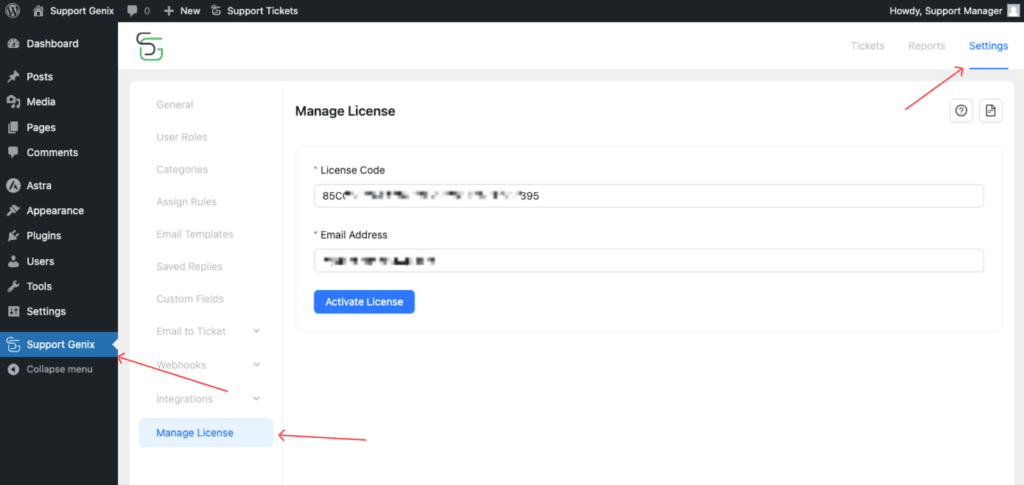
Activate the License
- Click the Activate License button to finalize the activation.
Optional: Install the Plugin via FTP
Steps to Install via FTP
- Extract the downloaded ZIP file to your computer.
- Use an FTP client to connect to your website’s server.
- Upload the extracted plugin folder to the following directory: /wp-content/plugins/.
- Log in to your WordPress Dashboard.
- Go to Plugins > Installed Plugins and activate Support Genix.
Conclusion
Installing and activating Support Genix is quick and easy. By following the steps above, you can download the plugin, upload it to your WordPress website, and activate your license seamlessly.
Start managing your support tickets efficiently with Support Genix today! 🚀
Last updated on March 15, 2026
Was this article helpful?
Powered by Support Genix