Manage Custom Fields
The Custom Fields feature in Support Genix gives you the freedom to collect additional information from your customers when they open a ticket or register. It enhances your ability to provide faster and more accurate support. You can even create conditional fields for specific categories, ensuring tailored data collection.
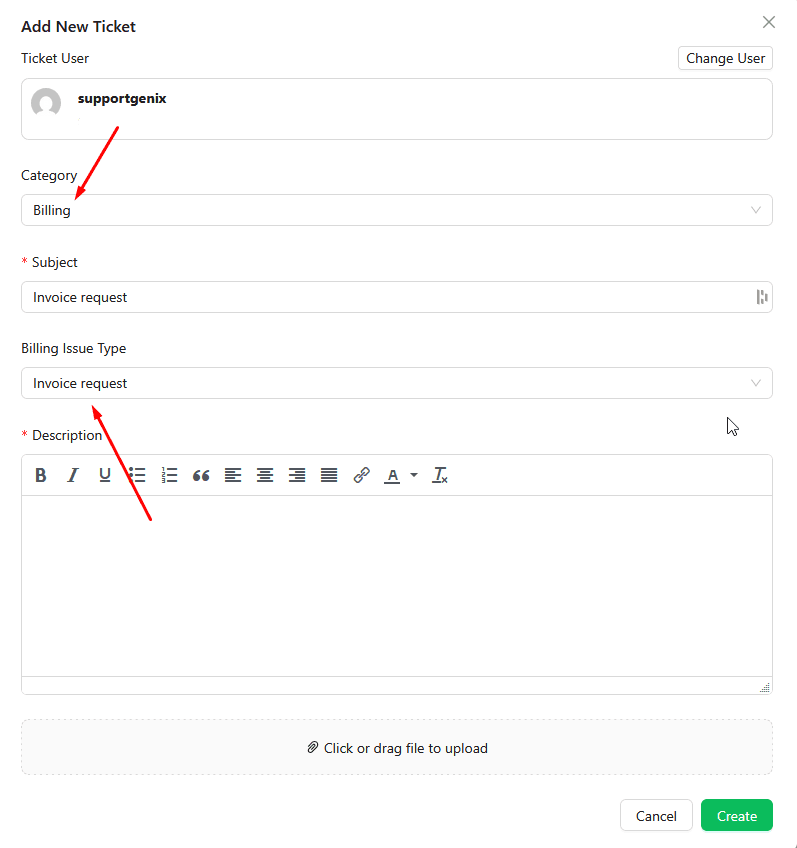
For example: You can display a custom field named “Invoice” only for tickets in the Billing category.
Benefits of Custom Fields
✅ Collect specific data for different categories.
✅ Improve ticket resolution time with more details upfront.
✅ Seamlessly manage data visibility for admins, agents, and customers.
How to Use Custom Fields
Step 1: Access Custom Fields
- Go to your WordPress Dashboard.
- Navigate to Support Genix > Settings > Custom Fields.
- Here, you will see the list of existing custom fields.

Step 2: Add a New Custom Field
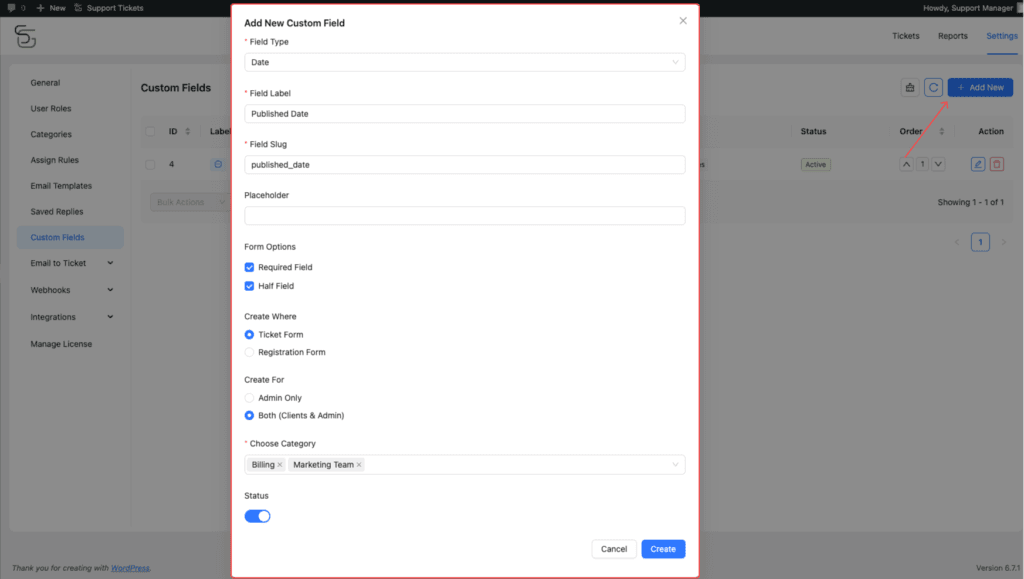
- Click on the “Add New” button.
- Fill in the following details:
- Field Type: Choose from 8 different field types:
- Textbox: Allows users to input freeform text (e.g., short answers or details).
- Numeric: Accepts only numeric values (e.g., phone numbers, quantities).
- Date: Enables users to select a date using a calendar picker.
- Switch: Provides a toggle option for simple Yes/No or On/Off choices.
- Radio: Displays multiple options where only one option can be selected.
- Dropdown: Offers a list of predefined options in a drop-down menu.
- Instruction Text: Displays informational text without any input field.
- URL Input: Allows users to input a valid website URL or link.
- Field Label: Add a name for the custom field.
- Field Slug: Automatically generated, but you can edit it (ensure it’s unique).
- Placeholder: Optional placeholder text for guidance.
- Form Options:
- Required Field: Make the field mandatory.
- Half Field: Display it in half-width.
- Create Where:
- Ticket Form or Registration Form.
- Create For:
- Admin Only or Both (Clients & Admin).
- Choose Category:
- Select one or multiple categories where this field will appear (e.g., Billing, Marketing Team).
- Field Type: Choose from 8 different field types:
- Once all details are filled, click “Create” to save the custom field.

Step 3: Edit or Delete a Custom Field
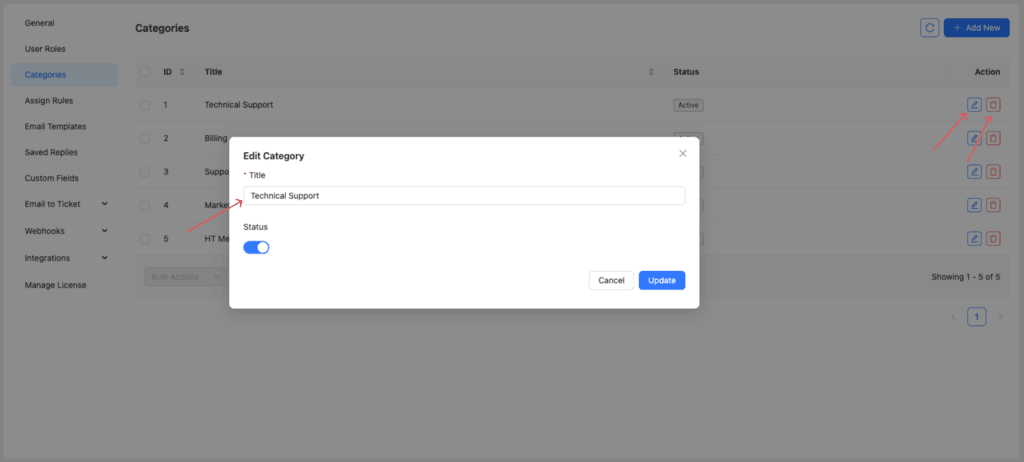
- To edit a custom field, click the Edit Icon.
- To delete a custom field, click the Delete Icon.

Step 4: Bulk Select and Action
If you need to manage multiple fields simultaneously:
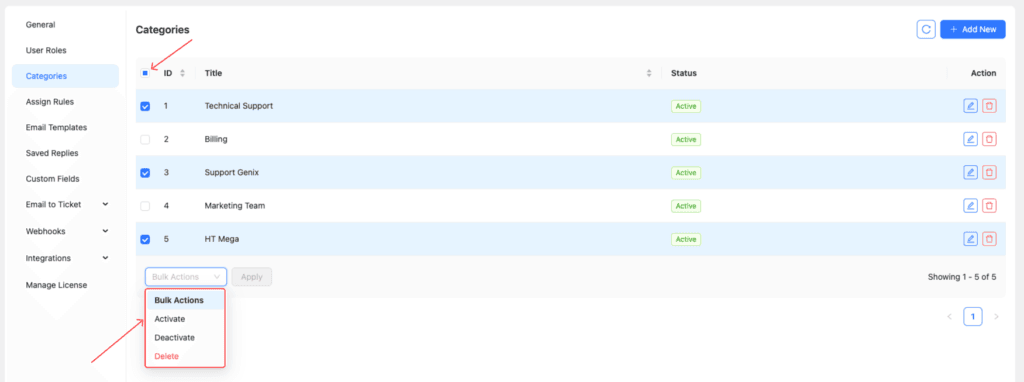
- Select multiple fields using the checkboxes.
- Use the Bulk Actions dropdown to:
- Activate
- Deactivate
- Delete fields.
- Click “Apply”.

Where Custom Fields Appear
- Ticket Form: When customers create a ticket, the custom fields appear based on the selected category.
- Example: If “Billing” is chosen, fields like “Invoice” will display.
- Admin/Agents: Custom fields also appear for admins and support agents when viewing or managing tickets.
- Conditional fields will only display if the relevant category is selected.

Last updated on July 8, 2025
Was this article helpful?
Powered by Support Genix