Slack Integration
Welcome to the Support Genix documentation for the Slack integration! This guide provides comprehensive instructions on setting up and utilizing the Slack integration within the Support Genix plugin. By integrating Slack with Support Genix, you can streamline your support process and enhance team communication by receiving real-time notifications and updates directly in your Slack channels.
Benefits of using Slack Integration
Slack integration offers numerous benefits, enhancing efficiency and customer satisfaction. Here are three key advantages:
- Real-Time Notifications: Receive instant alerts for ticket creation, updates, and assignments.
- Enhanced Collaboration: Centralized communication helps your team stay updated and resolve issues promptly.
- Improved Efficiency: Handle tickets faster and boost customer satisfaction.
Steps to Enable Slack Integration
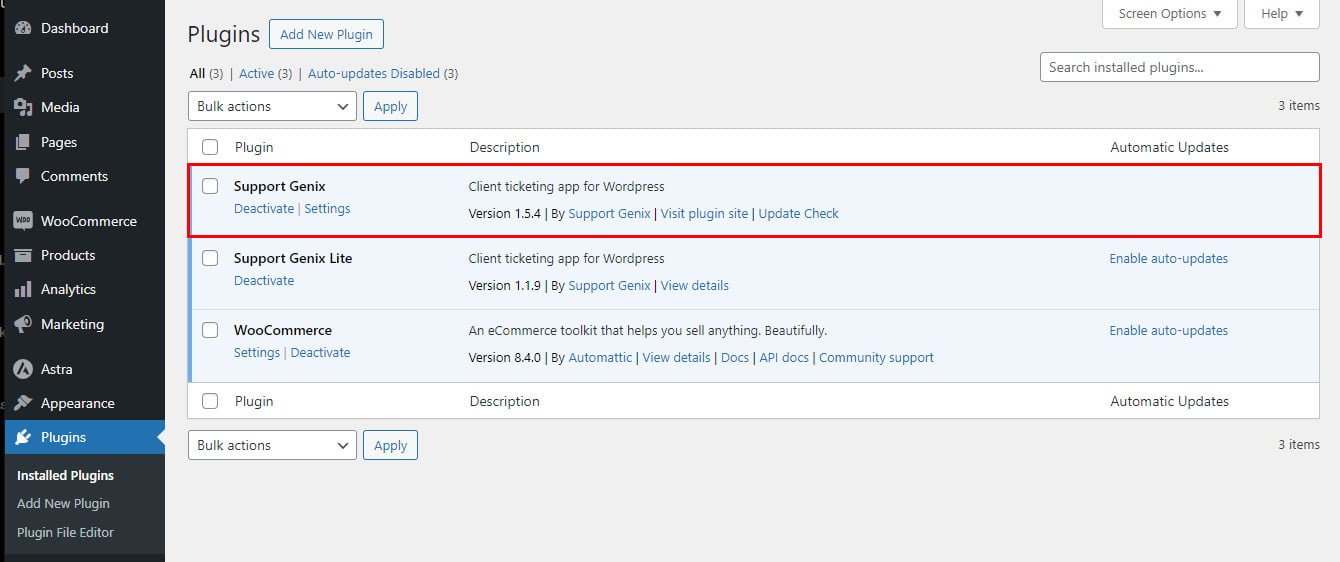
To enable Slack integration with Support Genix, make sure that Support Genix pro edition is activated on your website.
Step 1: Create a Slack App and Generate OAuth Token 🛡️
- Visit the Slack API Dashboard (link here).
- Click Create New App and provide a name (e.g., “Support Genix App”).
- Select your Slack workspace where the app will function.
- Navigate to OAuth & Permissions in the app settings:
- Generate a Slack Bot User OAuth Token and save it for later.
- Set the required scopes:
chat:write– To send messages.channels:read– To read channel information.users:read– To fetch user details.
- Install the app into your Slack workspace.
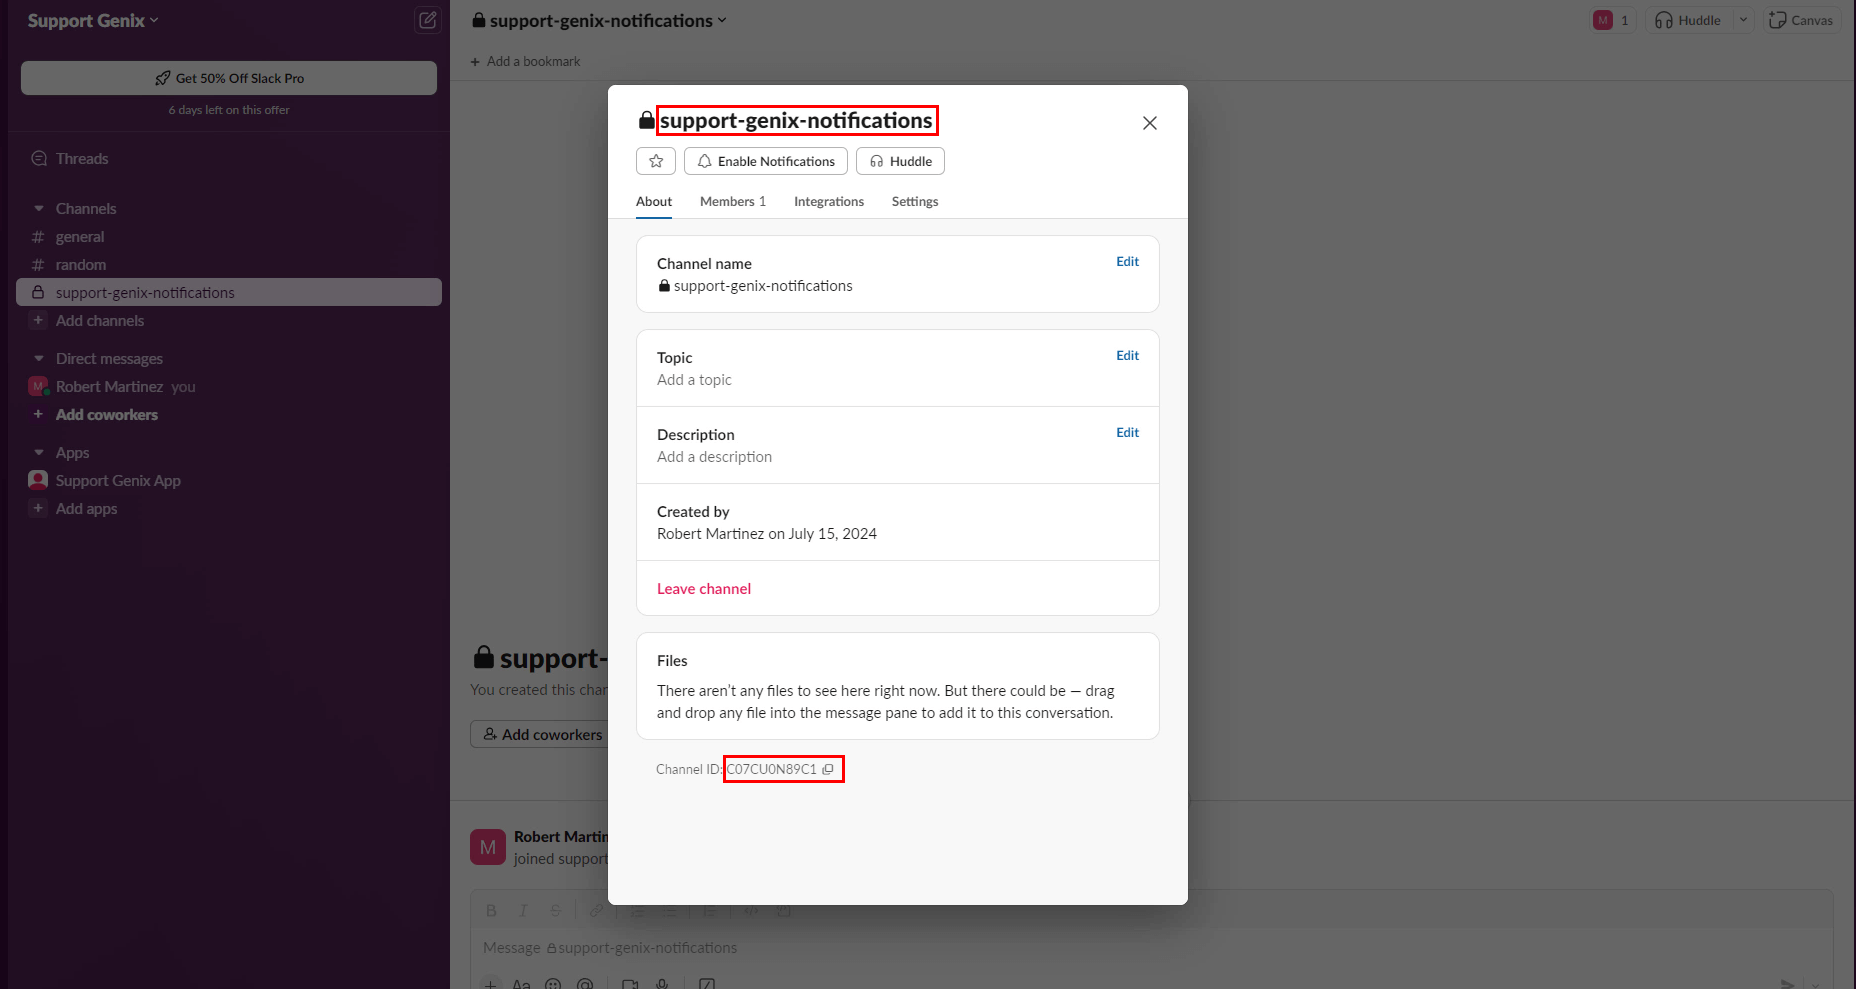
After creating the new channel, navigate to Apps in your Slack workspace. Select your app, and add it to the newly created support channel.
Upon completing the channel setup, copy Channel name and Channel ID. Then, paste them into the Support Genix Slack Settings.
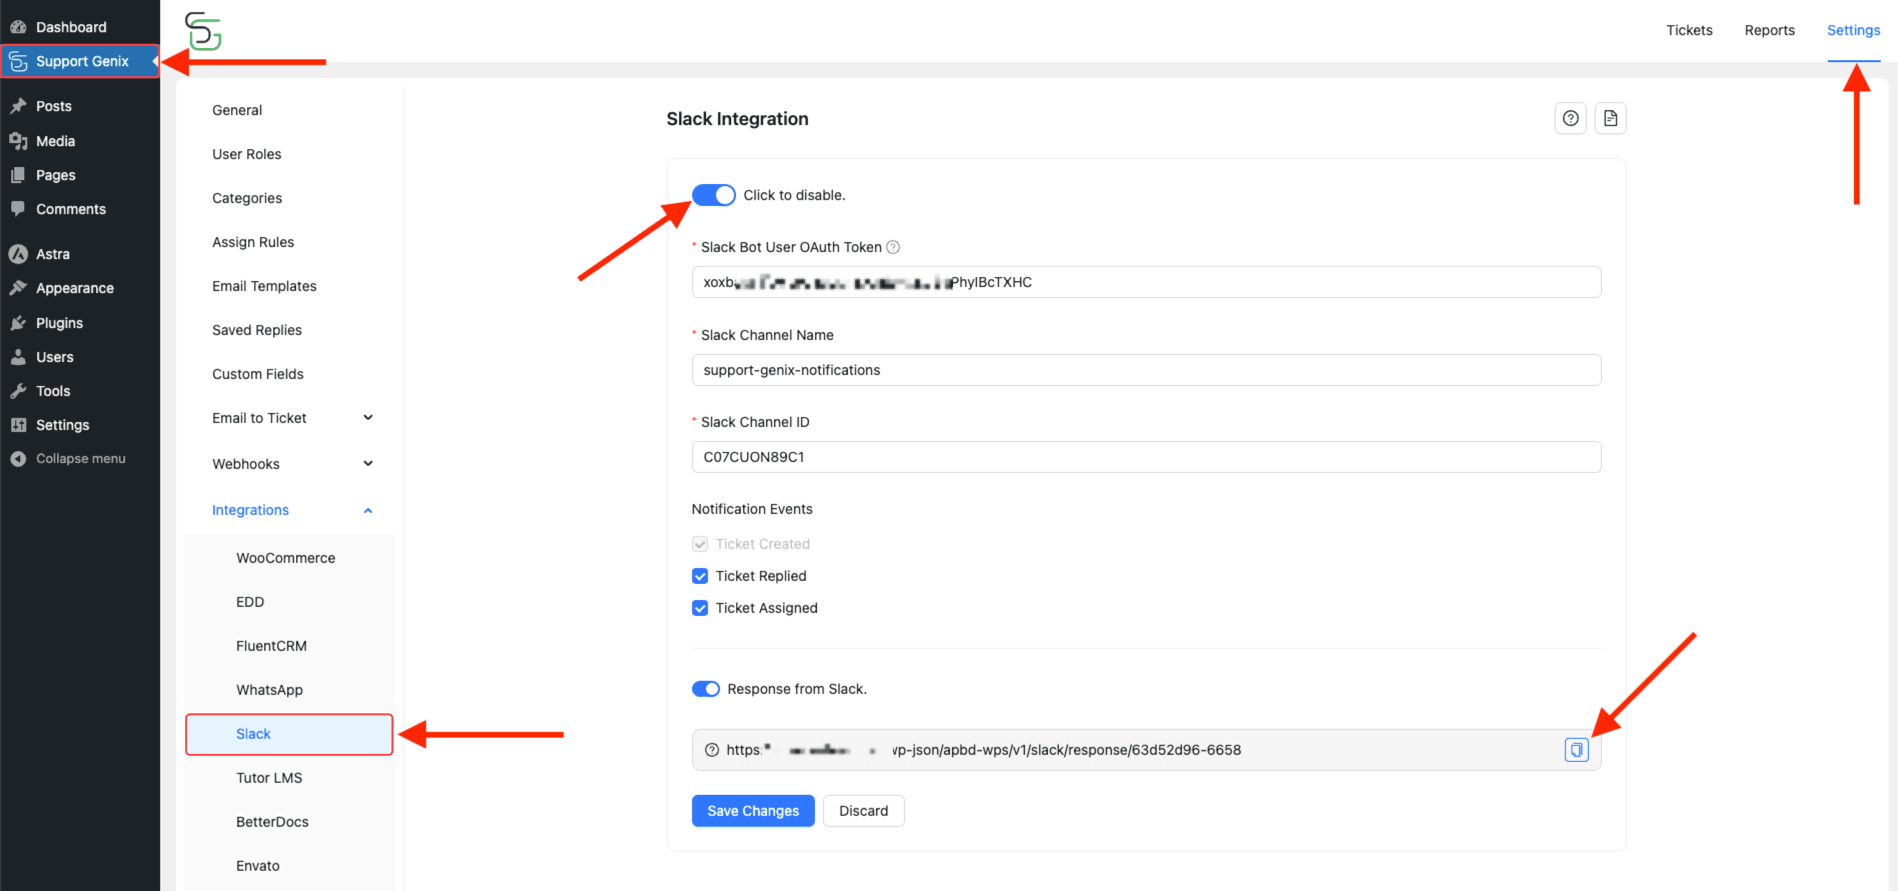
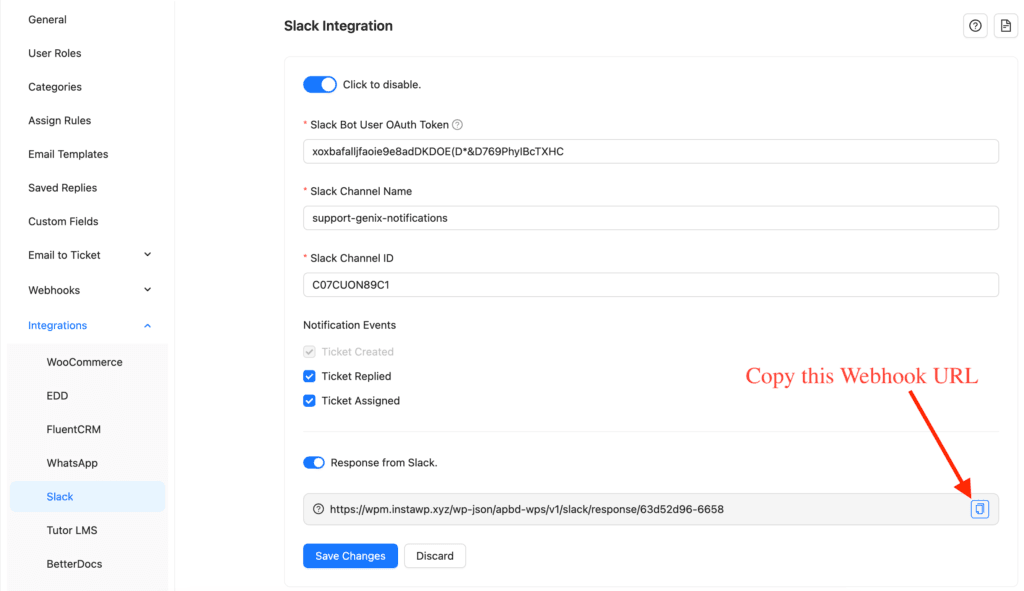
Step 2: Configure Slack Integration in Support Genix 🔧
- Open your Support Genix dashboard.
- Navigate to Settings > Integrations > Slack.
- Toggle the Enable Slack Integration switch.
- Enter the following details:
- Slack Bot User OAuth Token (copied from Step 1).
- Slack Channel Name (e.g.,
support-genix-notifications). - Slack Channel ID (fetch from Slack channel settings).
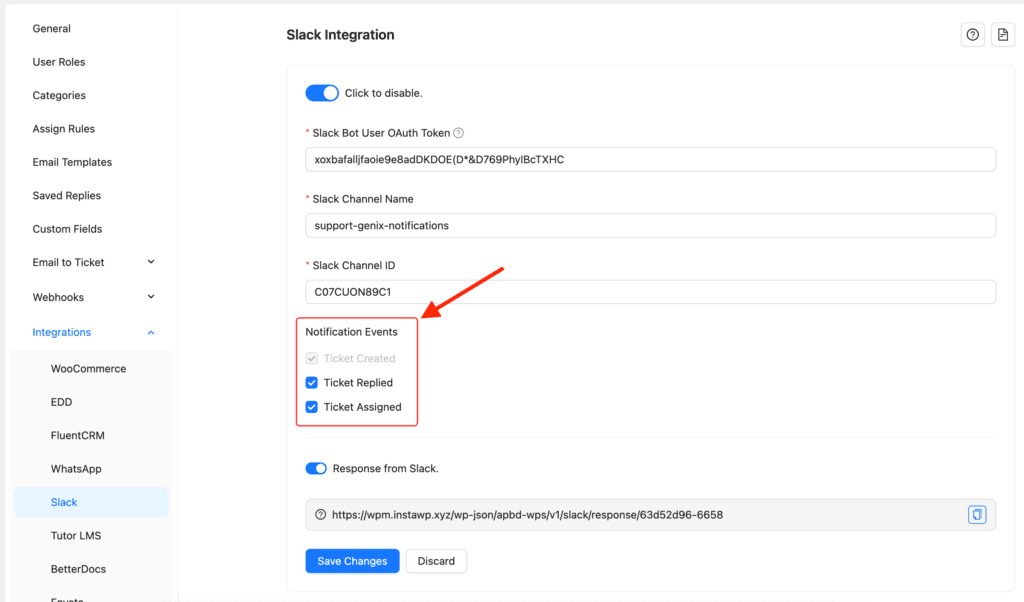
Step 3: Set Up Notification Events 🔔
- Enable specific notification events:
- Ticket Created
- Ticket Replied
- Ticket Assigned
Step 4: Enable Response from Slack 💬
- Toggle the Response from Slack switcher.
- Copy the Webhook URL provided in Support Genix.
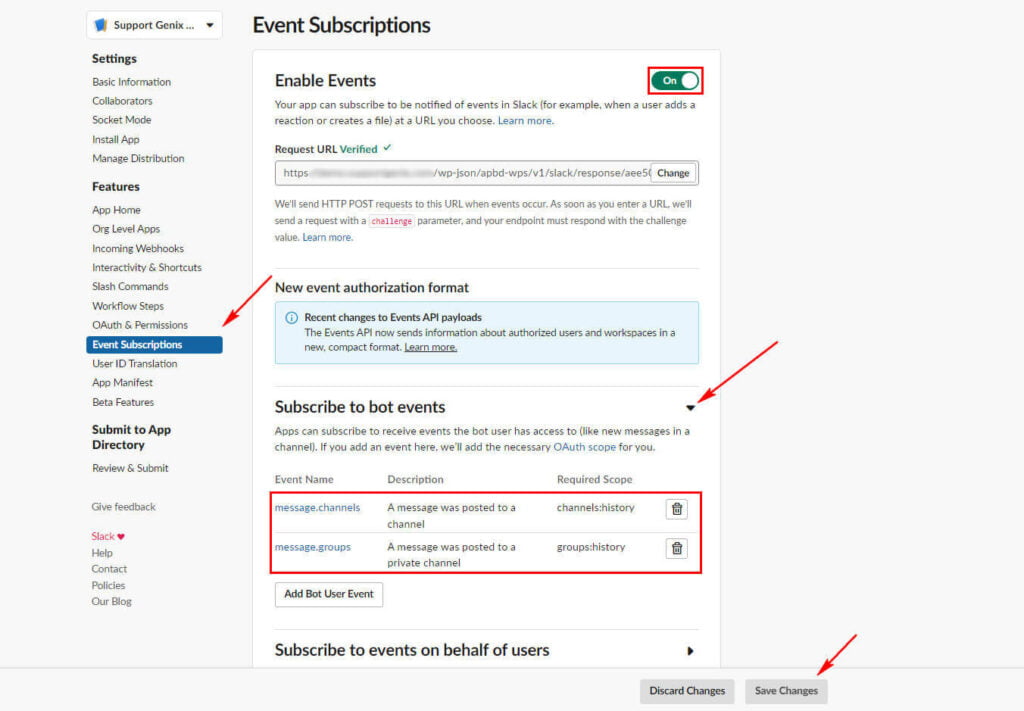
- Go back to your Slack app settings:
- Navigate to Event Subscriptions and paste the URL into the Request URL field.
- Add bot event subscriptions for:
message.channelsapp_mention
- Save changes.
After updating the app’s permission scopes, you will receive a notification to reinstall the app. Follow the prompt to complete the reinstallation.

Final Touch! 🎉
Once configured, Support Genix will send ticket updates to your chosen Slack channel. You can also respond to tickets directly from Slack, streamlining your support workflow.

That’s it! Thank you for choosing Suport Genix to enhance your user experience. If you need additional assistance, feel free to contact our support team. Our dedicated support team would be more than happy to assist you.
Last updated on March 15, 2026
Was this article helpful?
Powered by Support Genix