Set Up Gmail Forwarding for Automatic Ticket Management in Support Genix
Welcome to the Email Forwarding Documentation for Gmail. This guide provides step-by-step instructions on setting up and managing email forwarding within your Gmail account. If your Mailbox connected email address is hosted by Gmail, you can use email forwarding to automatically create tickets and replies from received emails.
After creating the mailbox in Support Genix, copy the generated Mailbox address and follow the steps below to set up email forwarding:
Benefits of Gmail Email Forwarding with Support Genix
✅ Effortless Ticket Creation: Automatically convert customer emails into support tickets for a streamlined workflow.
✅ Centralized Communication: Manage all customer inquiries in one platform for easier tracking and collaboration.
✅ Improved Response Times: Ensure quick responses by routing emails directly into the ticketing system.
✅ Customizable Workflows: Forward emails to specific Mailboxes to organize tickets by department or category.
✅ Enhanced Record Keeping: Retain copies of forwarded emails in Gmail while managing tickets in Support Genix.
Step 1: Enabling Email Forwarding
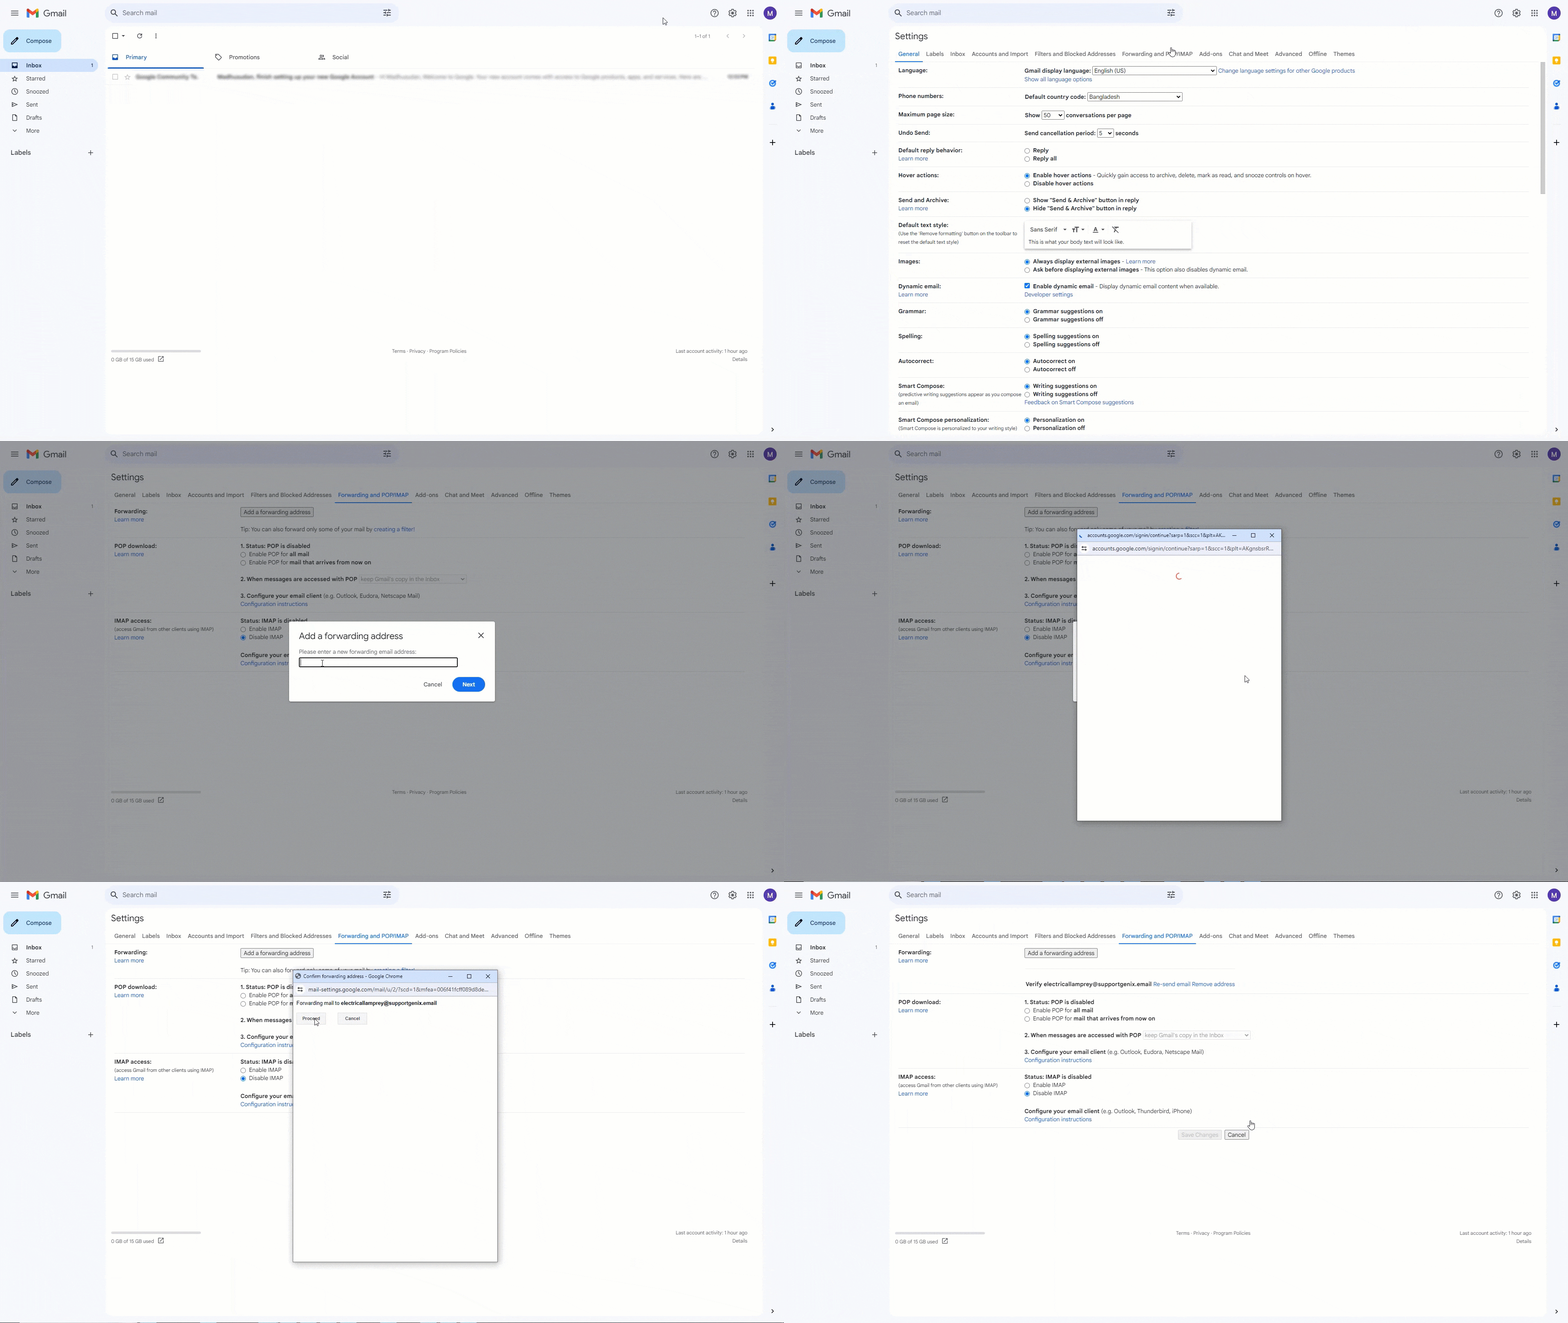
- Log in to your Gmail account and click the gear icon in the top-right corner to open the Settings menu.
- Click on See all settings, then navigate to the Forwarding and POP/IMAP tab.
- Click Add a forwarding address and enter the destination email address (the generated Mailbox address from Support Genix).
- Confirm the forwarding address.

Step 2: Verification Process
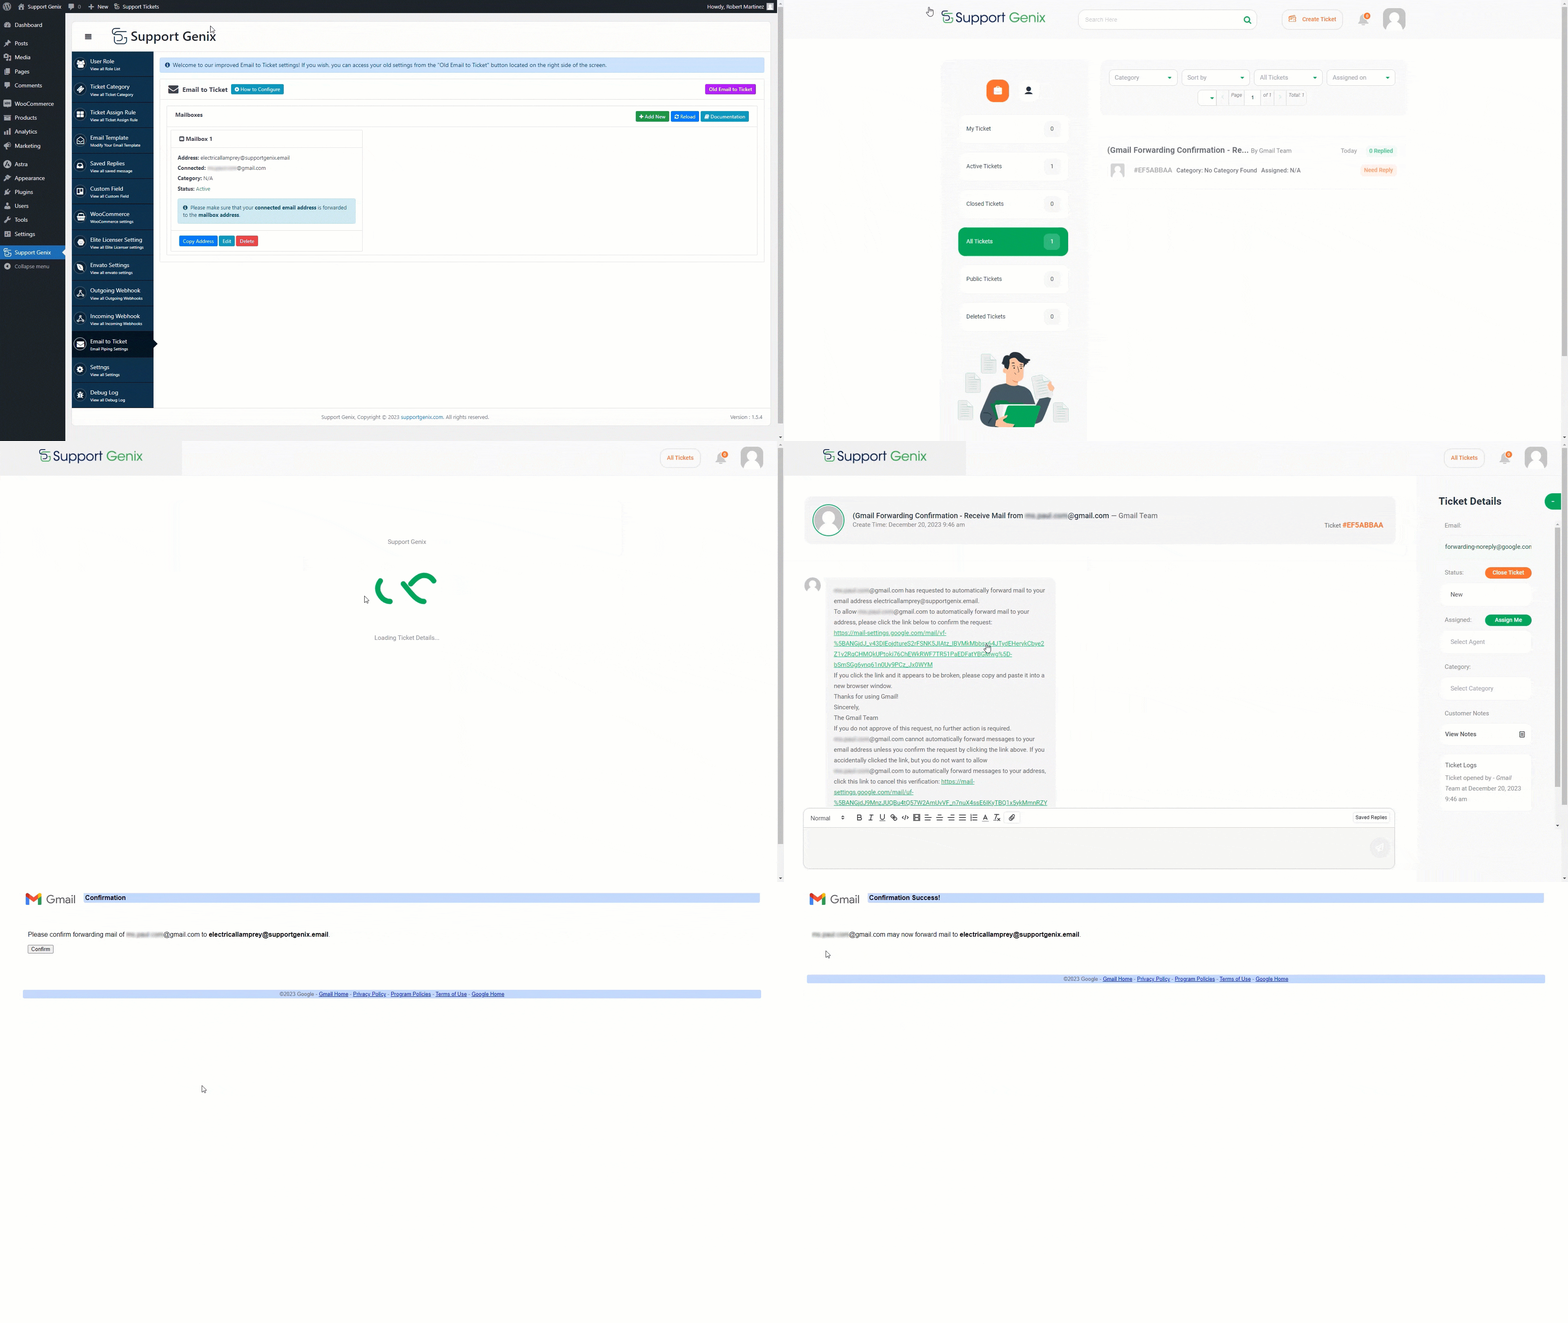
- After confirming the forwarding address, wait for 2 minutes.
- Navigate to the Tickets page in Support Genix.
- Locate the ticket generated for the verification email and open the Ticket Details page.
- Click on the verification link in the email to complete the email forwarding setup.

Step 3: Choosing Forwarding Options
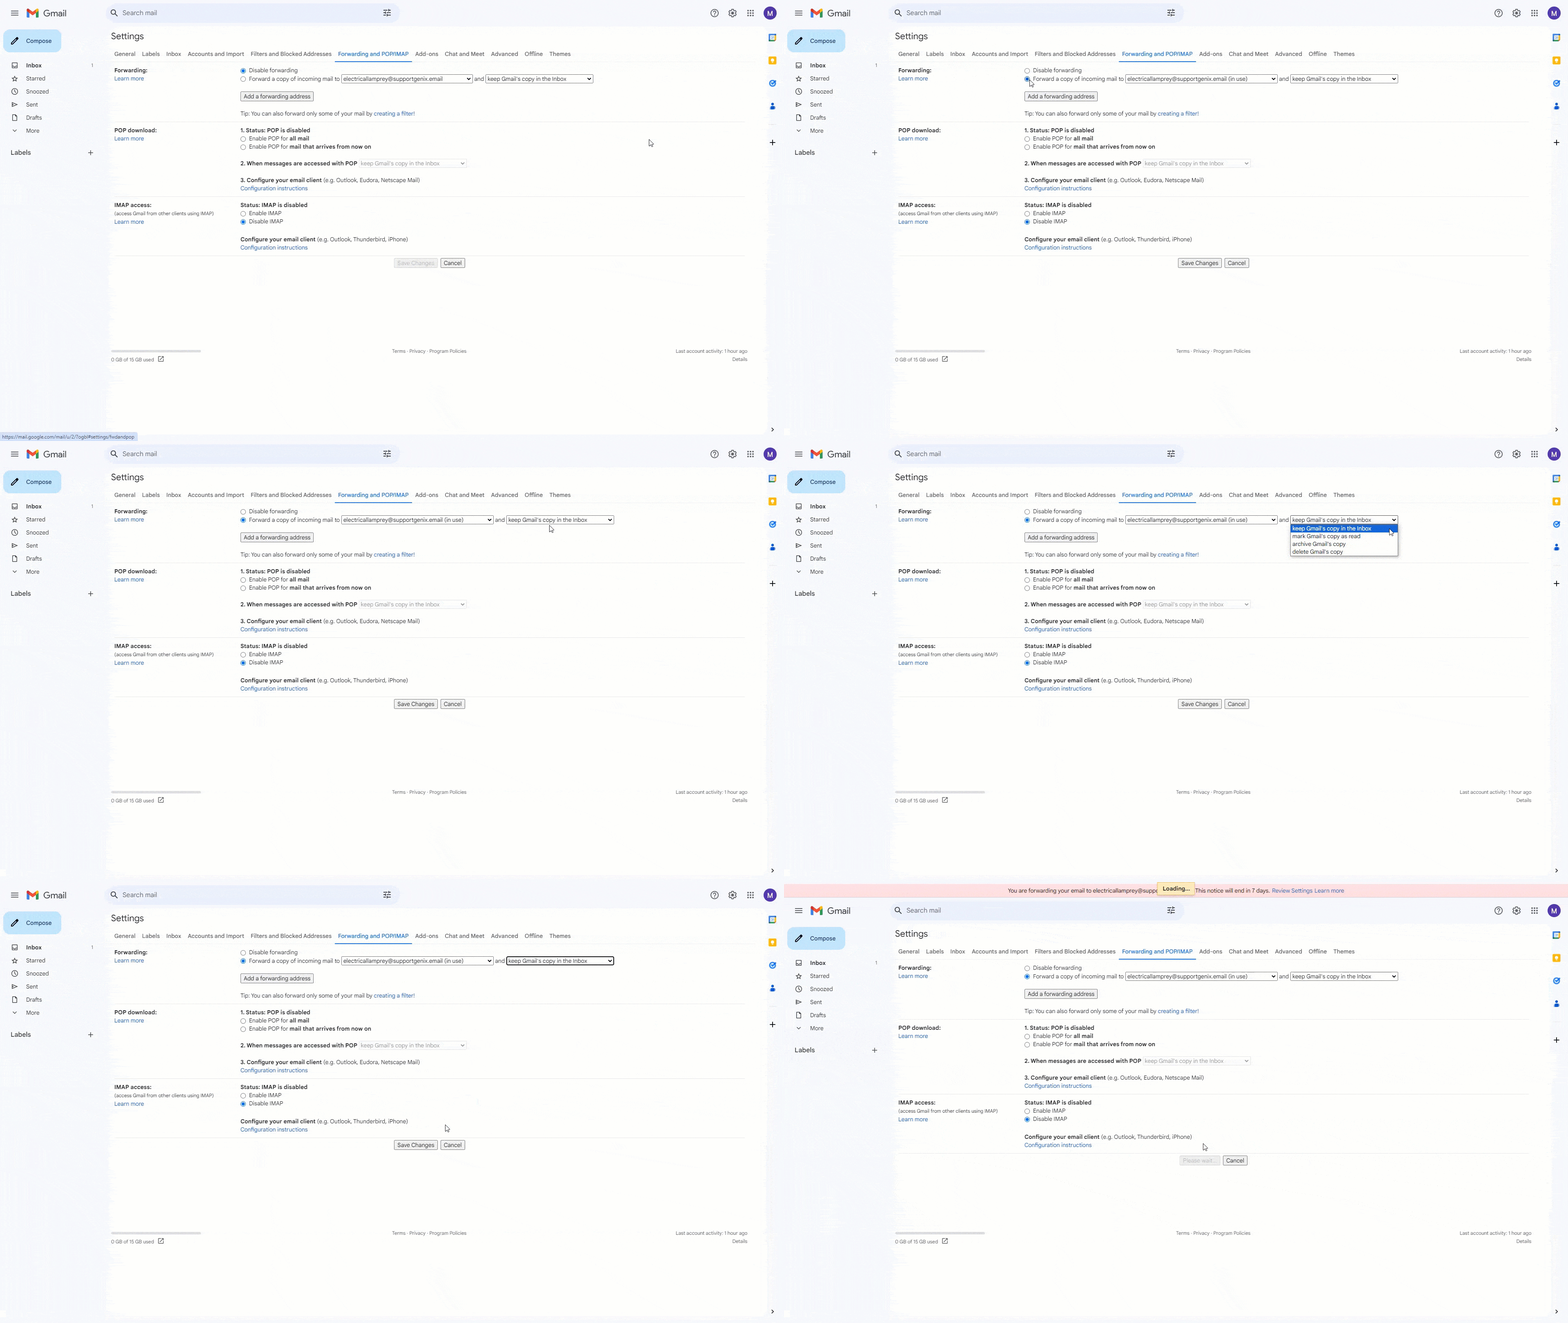
- Once the verification process is complete, return to the Forwarding and POP/IMAP tab in Gmail settings.
- Select whether to keep a copy of forwarded emails in your Gmail inbox.
- Recommendation: Keep a copy of forwarded emails for better tracking and backup purposes.
- Click the Save Changes button to finalize the setup.

Now, emails sent to your Gmail address will automatically forward to the generated Mailbox address in Support Genix. This enables you to streamline your ticket management process with ease and efficiency.
Elevate Your Support System with Support Genix Pro
Effortlessly manage tickets and supercharge your customer support workflow with support genix pro for only $1 Trail
Cancel anytime during the trial.