WhatsApp Integration for Support Genix
Welcome to the updated WhatsApp Integration Documentation for Support Genix! This guide provides step-by-step instructions to seamlessly integrate WhatsApp into the Support Genix platform. With this integration, you can streamline communication by sending and receiving WhatsApp notifications for ticket events, such as creation, replies, and assignments. Support agents can also respond directly via WhatsApp for prompt and efficient ticket resolution.
This integration enhances support workflows, customer satisfaction, and real-time interaction.
Benefits of WhatsApp Integration
- 🚀 Instant Notifications: Receive real-time updates on ticket activities directly to WhatsApp.
- ⚡ Faster Response Times: Respond to tickets from WhatsApp to address customer concerns immediately.
- 📈 Improved Efficiency: Streamline workflows by enabling agents to manage tickets directly via WhatsApp.
- 💬 Familiar Interface: Leverage WhatsApp’s user-friendly platform for seamless communication.
- 🤝 Better Customer Engagement: Build stronger relationships by using a platform customers trust.
Steps to Enable WhatsApp Integration
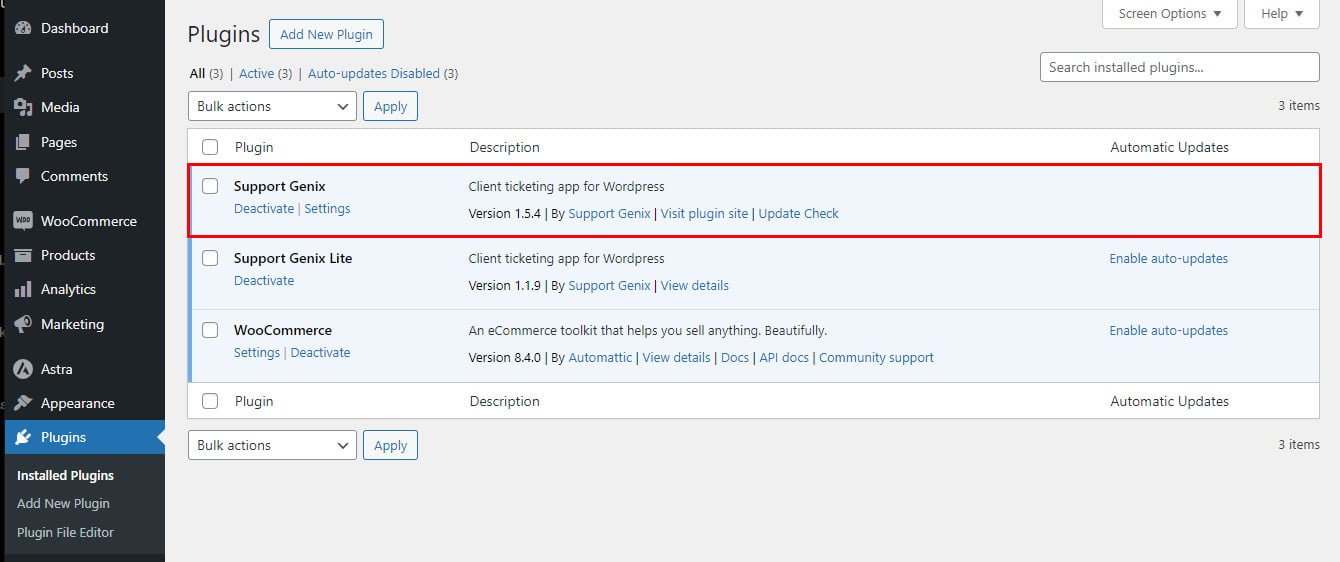
To enable WhatsApp Integration with Support Genix, make sure that Support Genix pro edition is activated on your website.
Step 1: Sign Up on Twilio
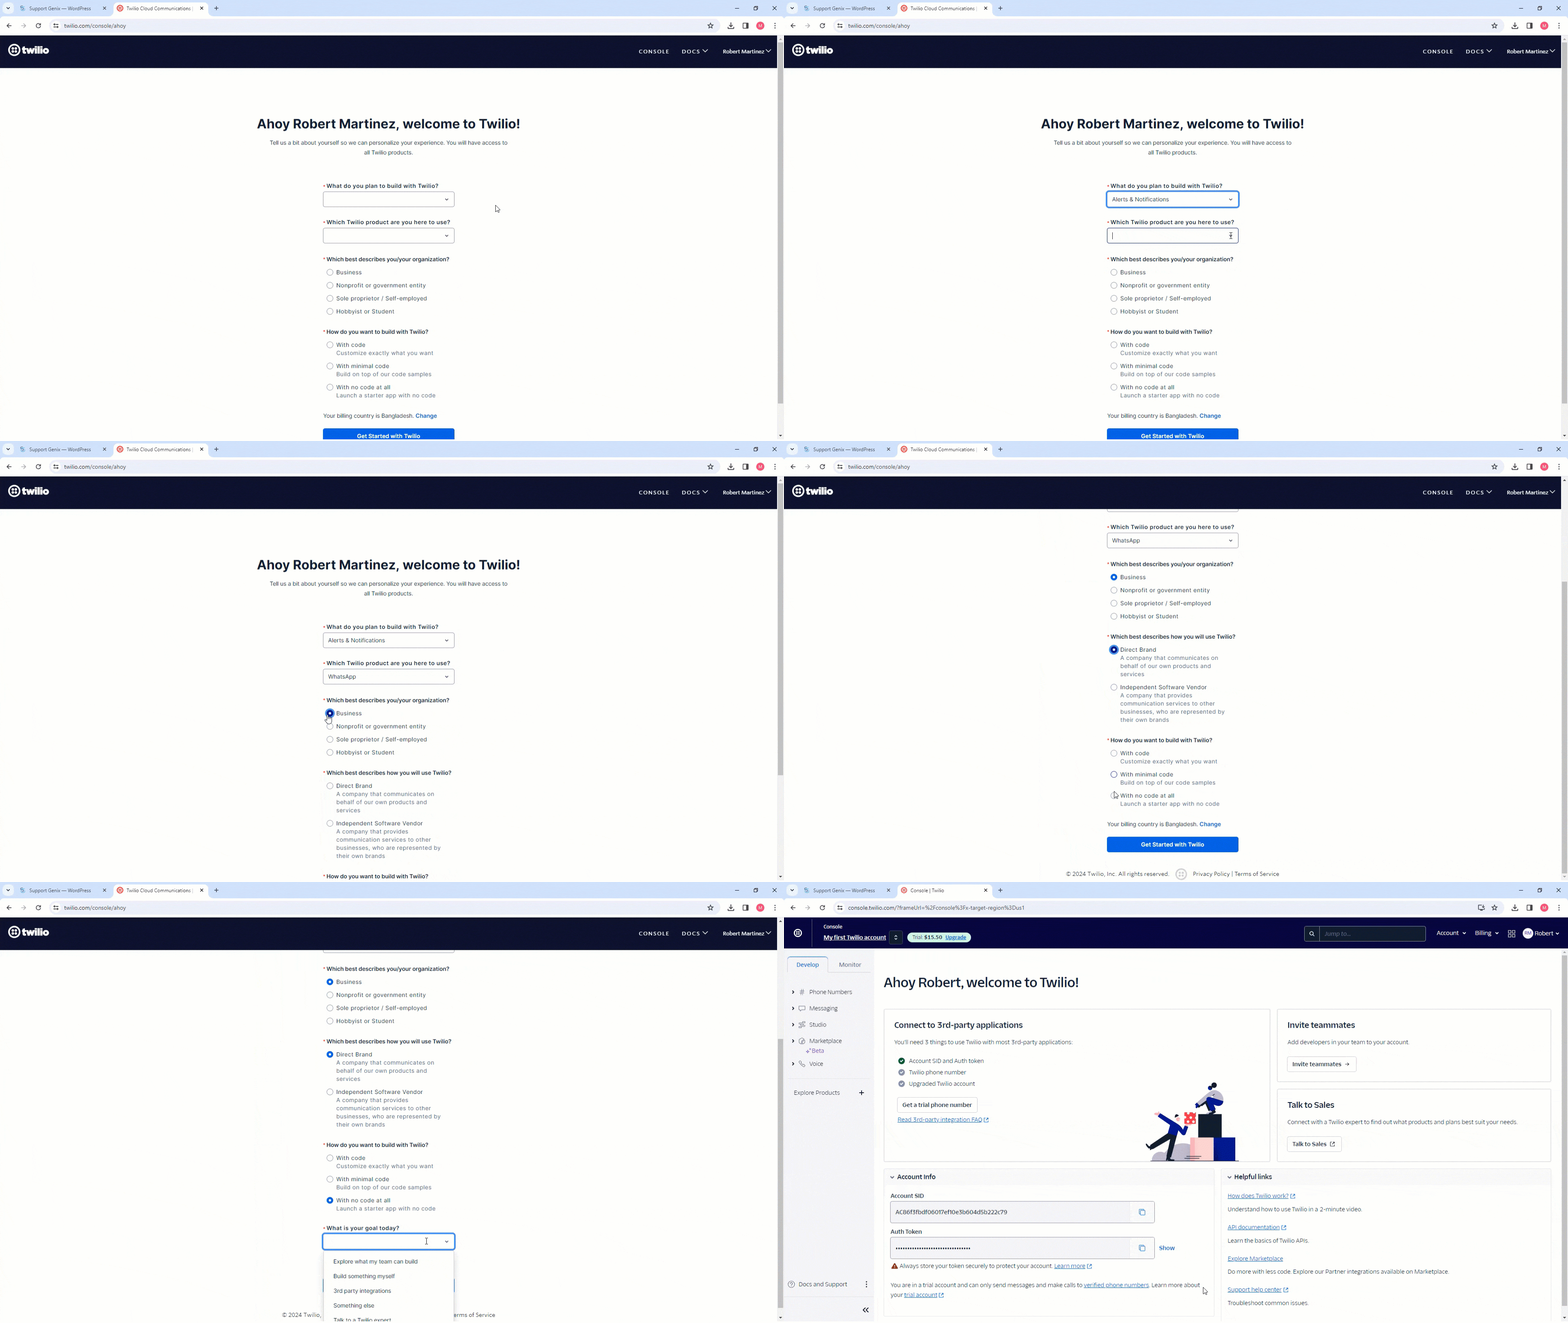
- 🌐 Go to Twilio and sign up for a free account.
- 📧 Provide your email address and verify your mobile number.
- 🔒 Once registered, proceed to the Twilio console.
Step 2: Configure Twilio Console
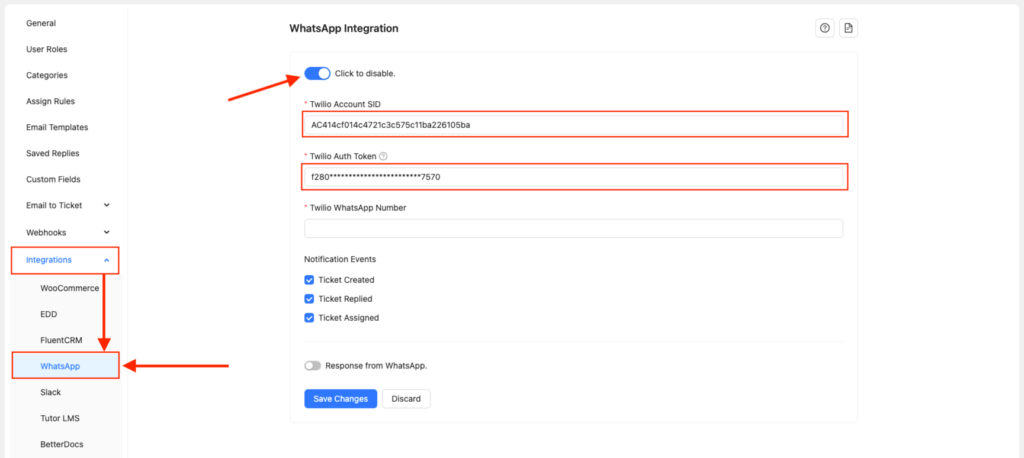
- Access your Twilio Console and copy your:
- Account SID
- Auth Token
- Paste these details into the Support Genix > Settings > Integrations > WhatsApp section.
Step 3: Set Up WhatsApp Sandbox
Step 3.1: Navigate to Twilio Console
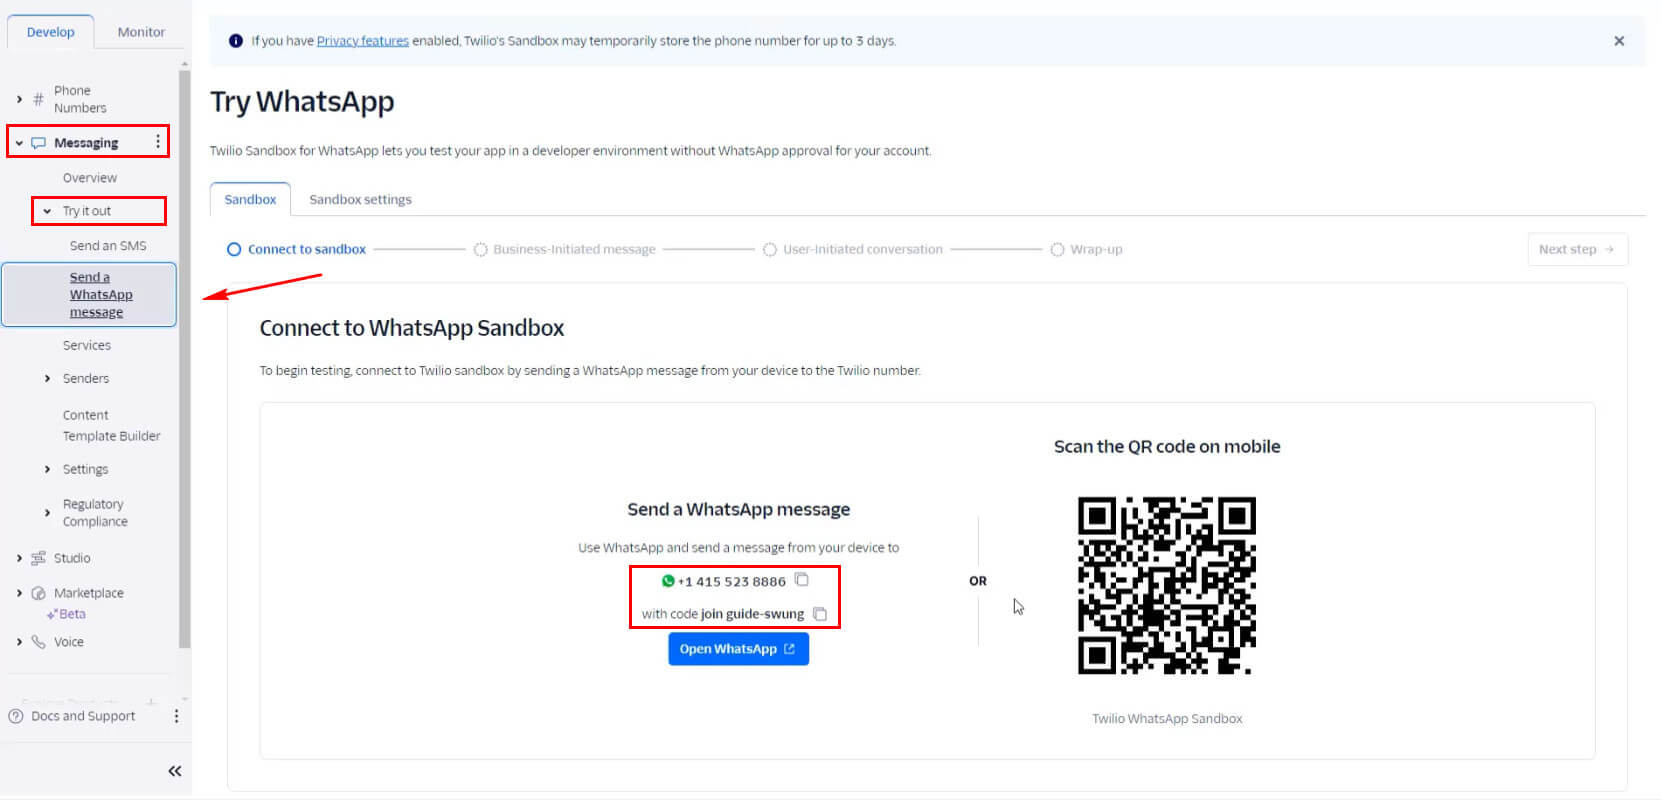
Go to Twilio Console > Messaging > Try It Out > Send a WhatsApp Message. This is where you’ll start configuring the WhatsApp Sandbox.
Step 3.2: Activate the Sandbox
Twilio will provide you with:
- A WhatsApp Number
- A Sandbox Code
Save the Twilio WhatsApp Number in your phone’s contacts. You will use this number for testing purposes.
Step 3.3: Join the WhatsApp Sandbox
- Create a new WhatsApp contact using the Twilio WhatsApp Number.
- Next, send the provided Sandbox Code from your WhatsApp account to this contact.
This action joins your WhatsApp account to the sandbox environment, preparing it for testing.
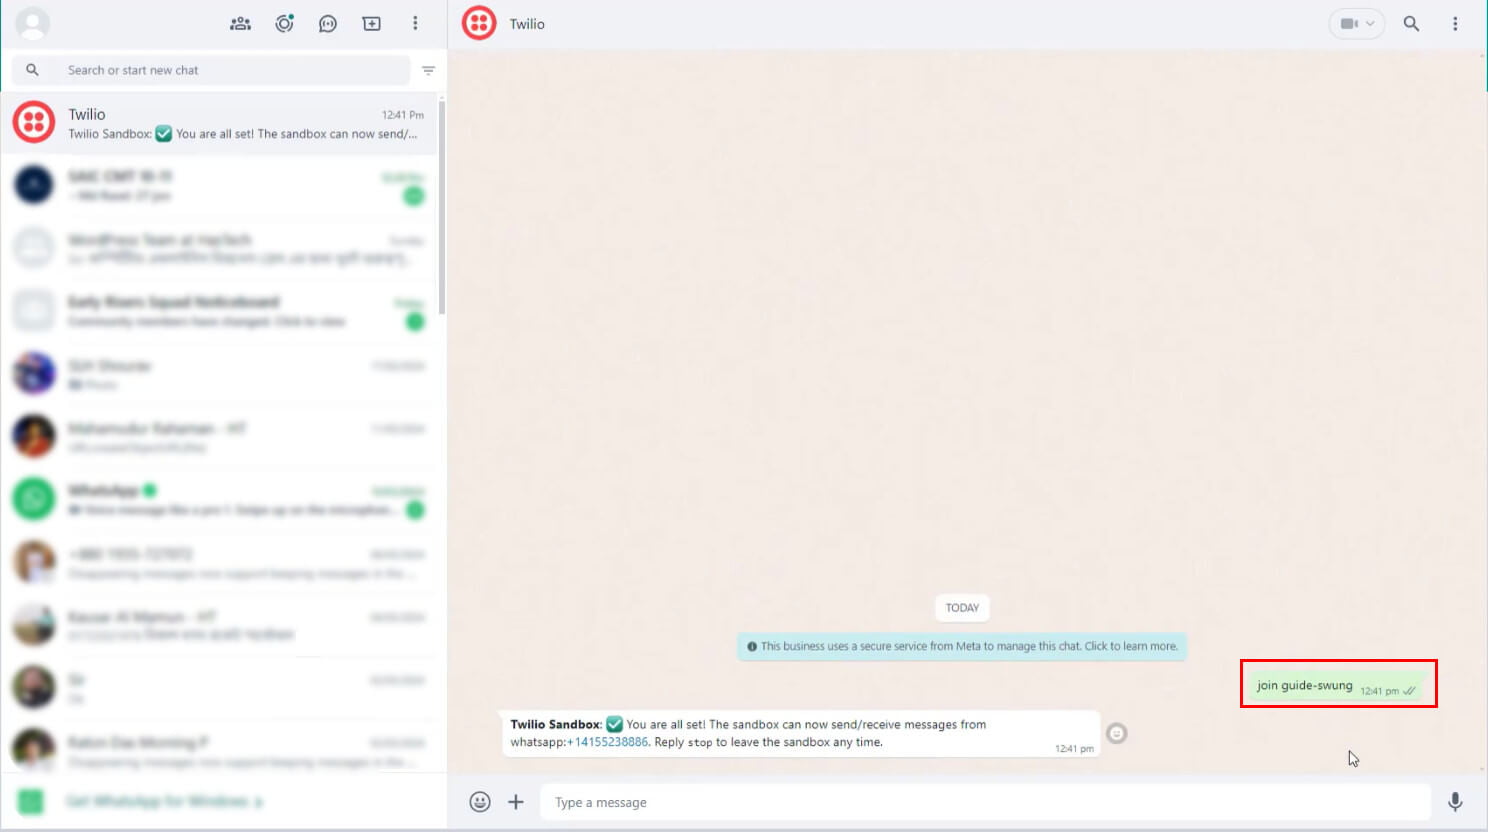
Step 3.4: Send a Template Message
Go back to the Twilio console, where you will find the Business-initiated message page.
- Select a pre-approved Message Template such as “Appointment Reminders.“
- Click on Send Template Message to send the message to your WhatsApp account.
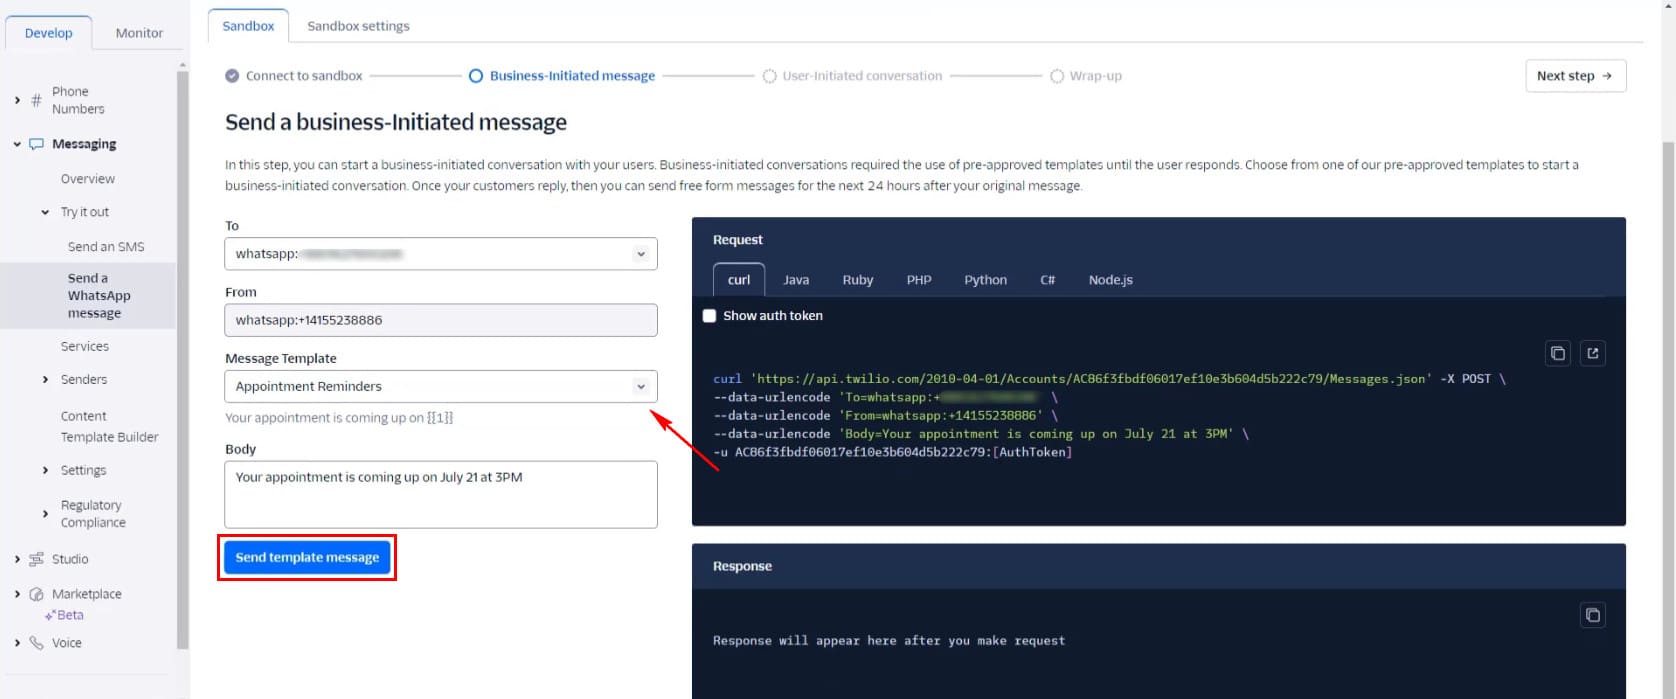
Step 3.5: Respond to the Template Message
- Open the WhatsApp app on your device. You will see the message sent by Twilio.
- Reply to the message to start a user-initiated conversation.

Step 3.6: Finalize the Sandbox Setup
- Once you’ve responded to the message, go back to the Twilio console.
- Click on Next Step to complete the WhatsApp Sandbox configuration.
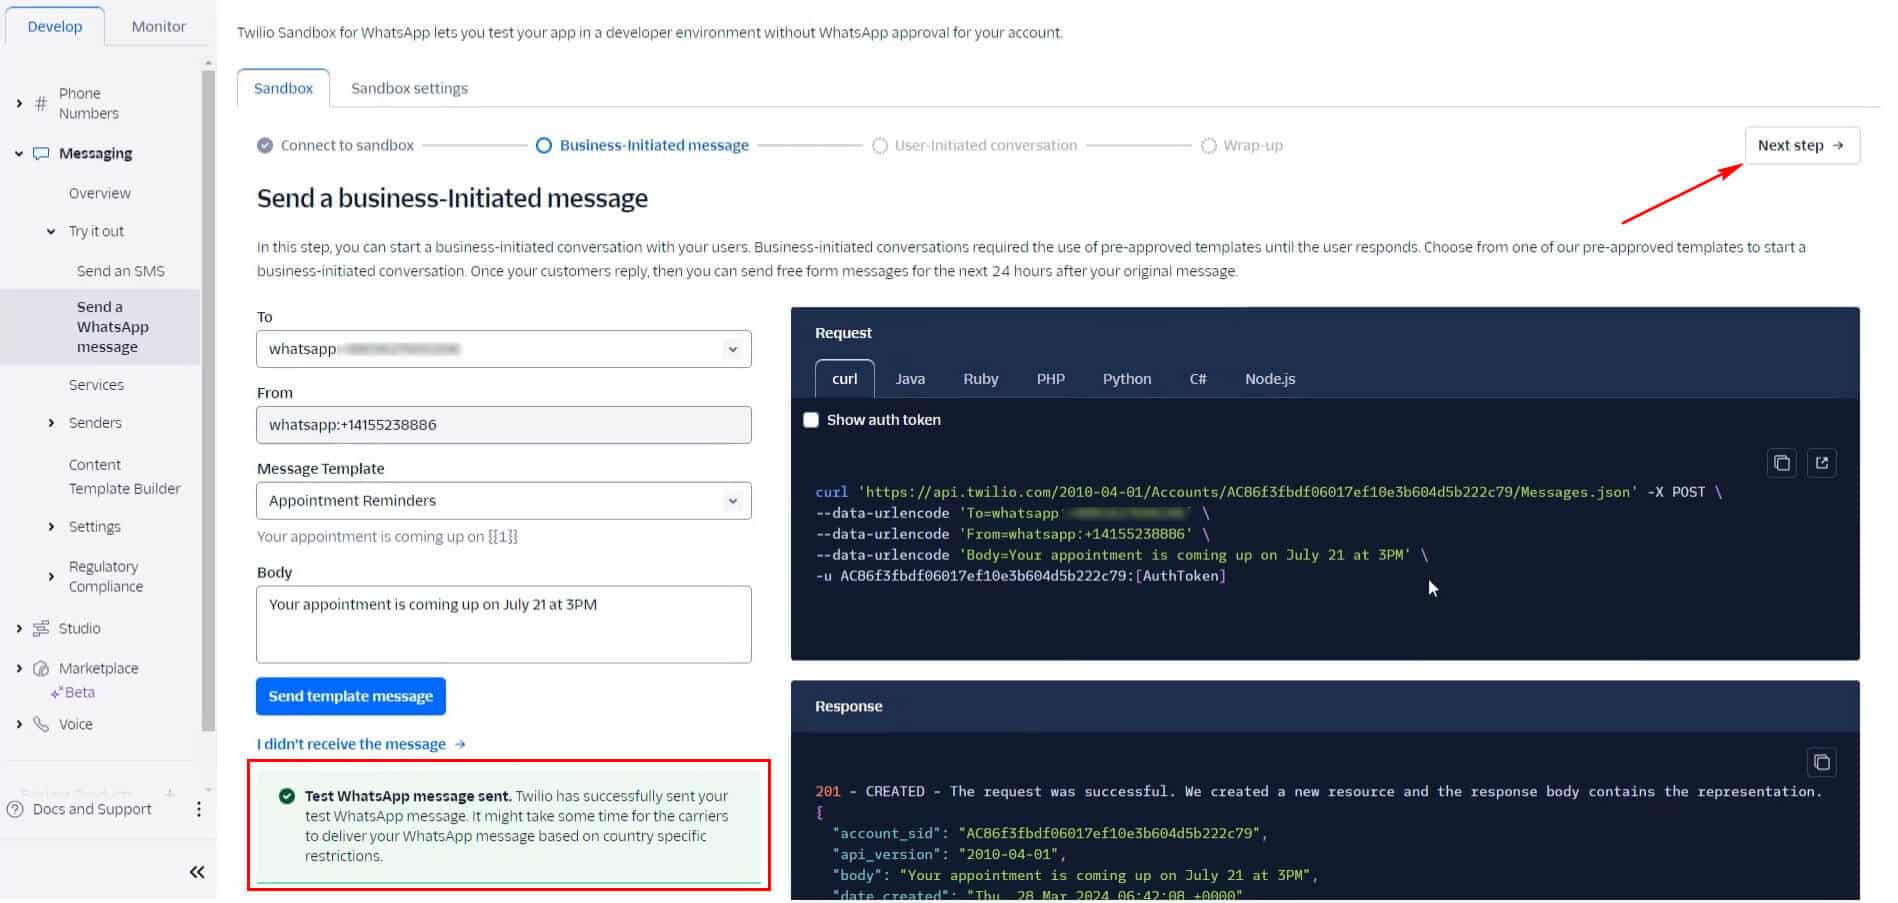
Step 3.7: Start a User-Initiated Conversation
- Navigate to the User-Initiated Conversation Page
In the Twilio Console, go to Messaging > Try It Out > Send a WhatsApp Message, then click on the User-Initiated Conversation tab.
After navigating to the User-initiated conversation page, you need to respond to the notification (sent by Twilio) from your WhatsApp account. This will prompt another message notification in your Twilio WhatsApp chat.

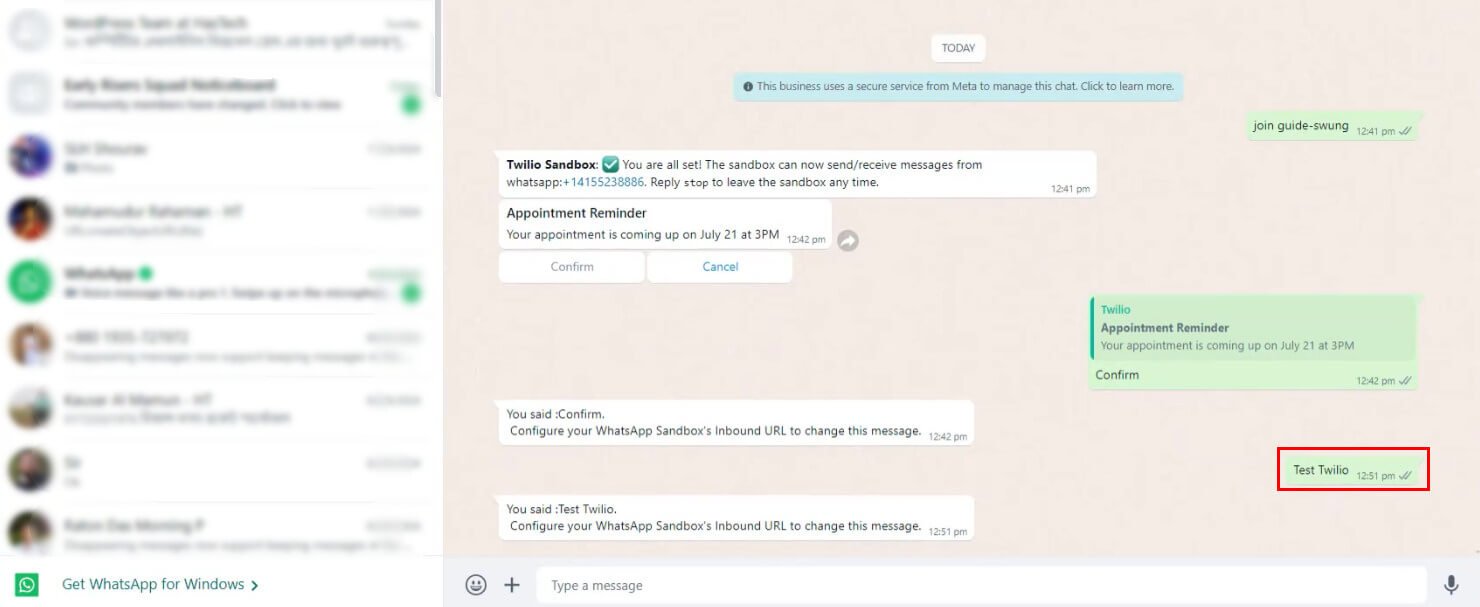
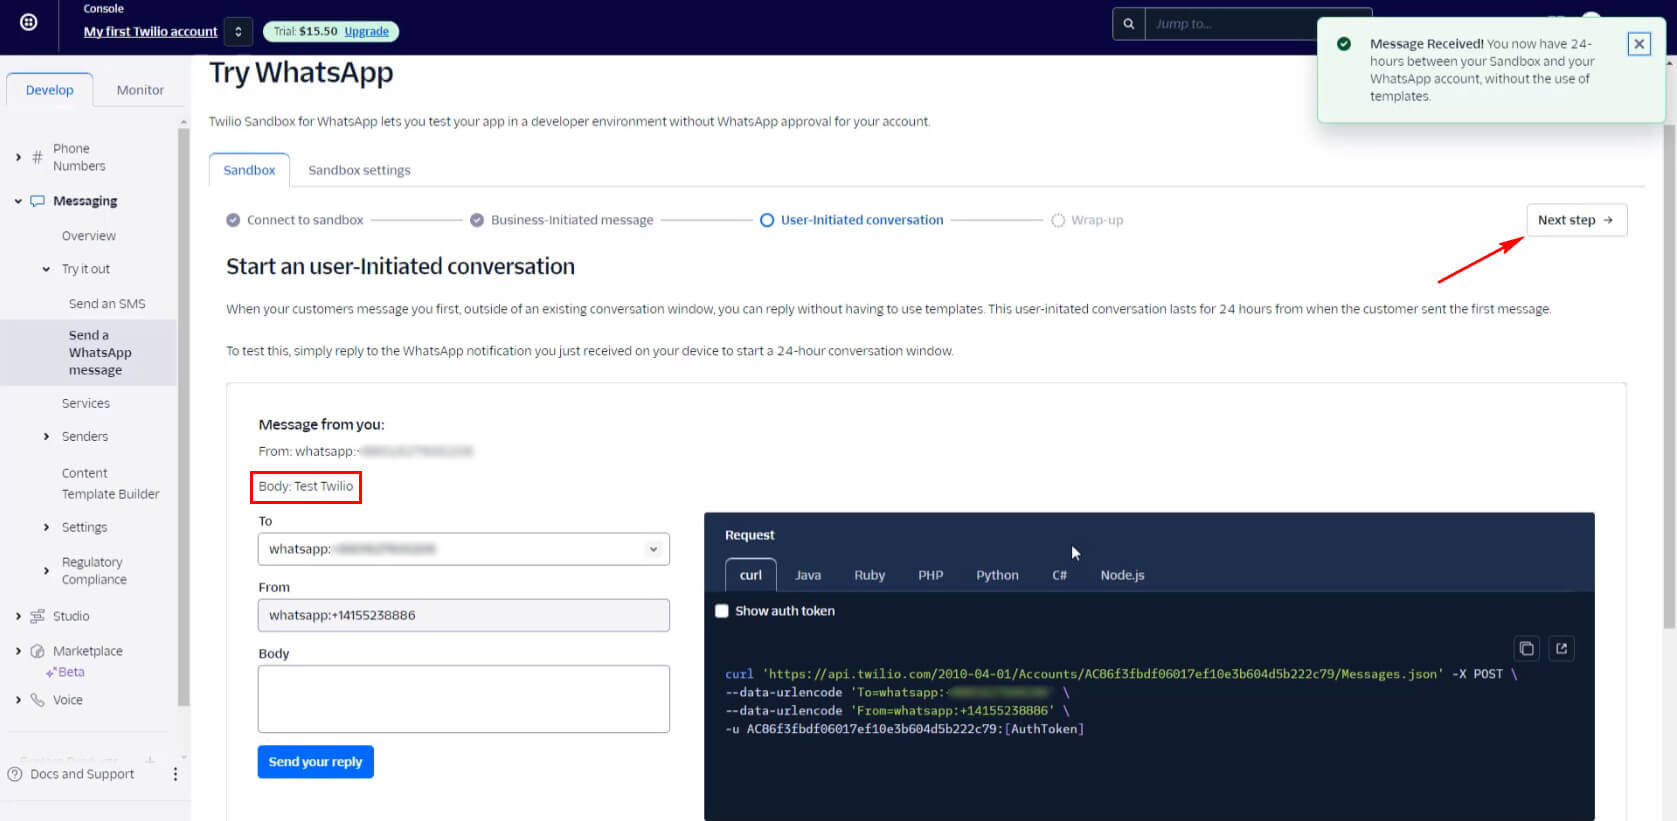
Upon sending the test reply, proceed by clicking on the Next step button to ensure the completion of the WhatsApp Sandbox setup in a proper manner.
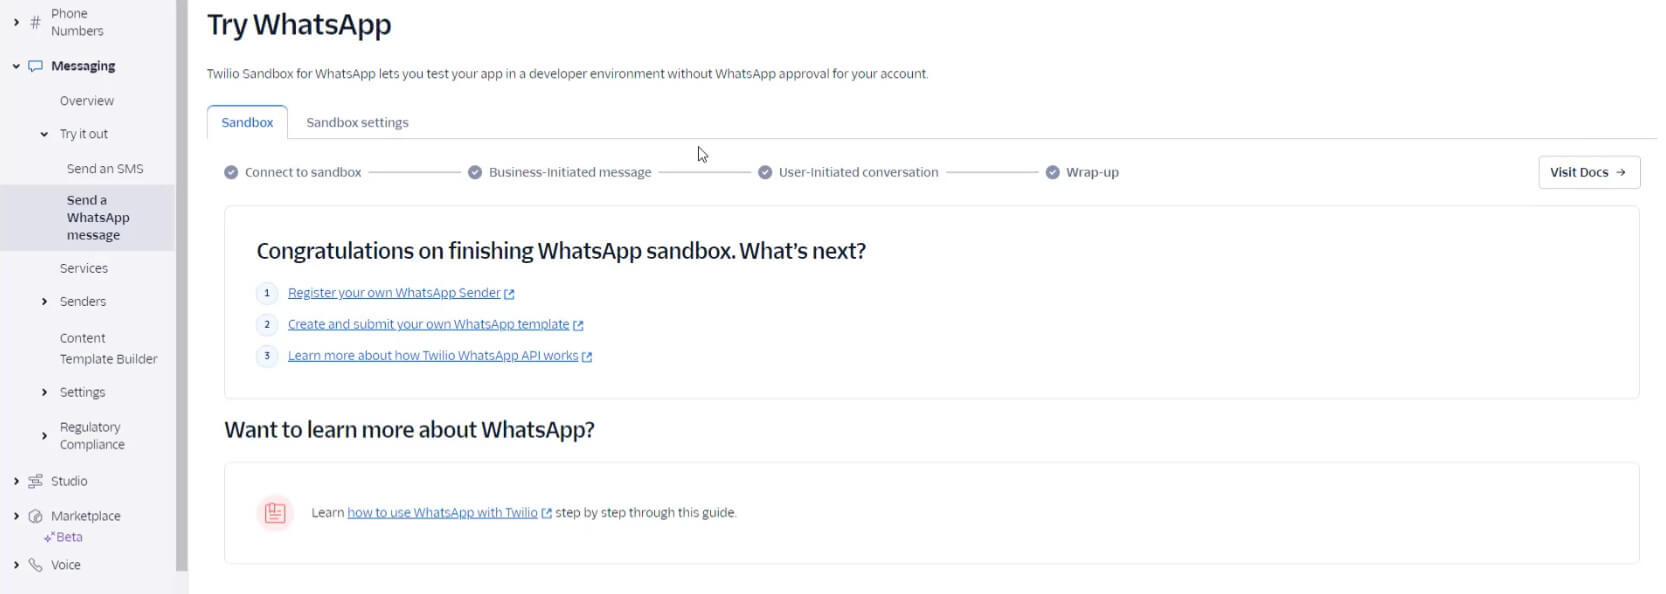
Step 4: Enable WhatsApp Response
Step 4.1: Copy Sandbox WhatsApp Participant Number
- Find the WhatsApp Participant Number in Twilio’s Sandbox settings.
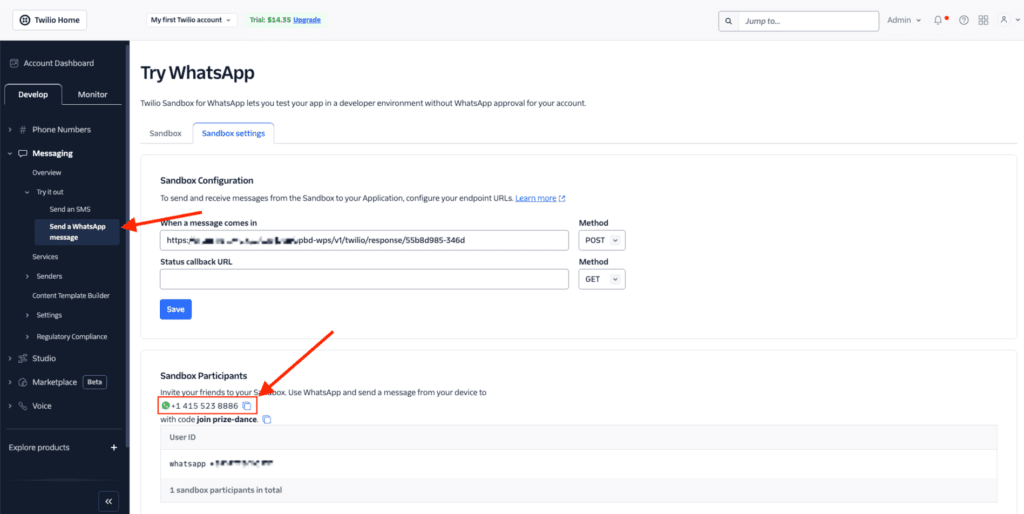
Step 4.2: Paste the Number in Support Genix & Enable WhatsApp Response
- Navigate to Support Genix > Settings > Integrations > WhatsApp.
- Enter the Participant Number into the “Twilio WhatsApp Number” field.
- Toggle the Enable Response from WhatsApp switch.
- Copy the generated Webhook URL and click Save.
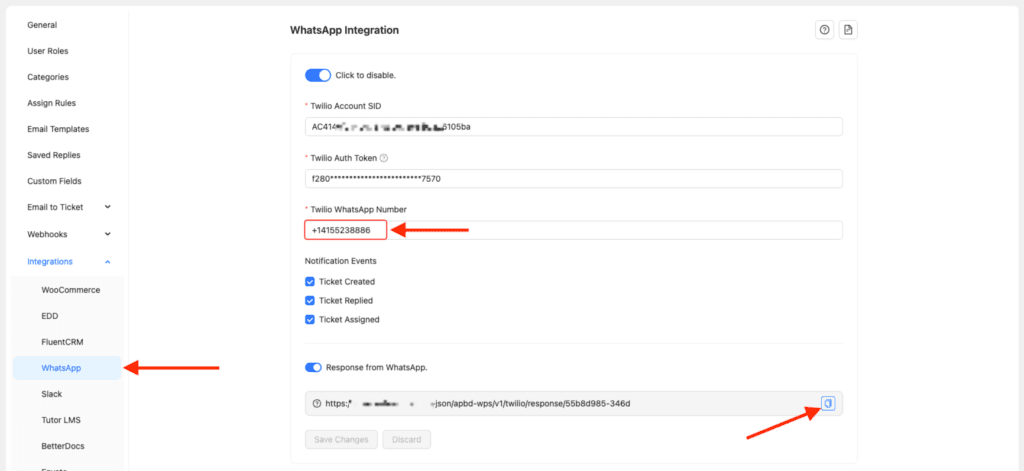
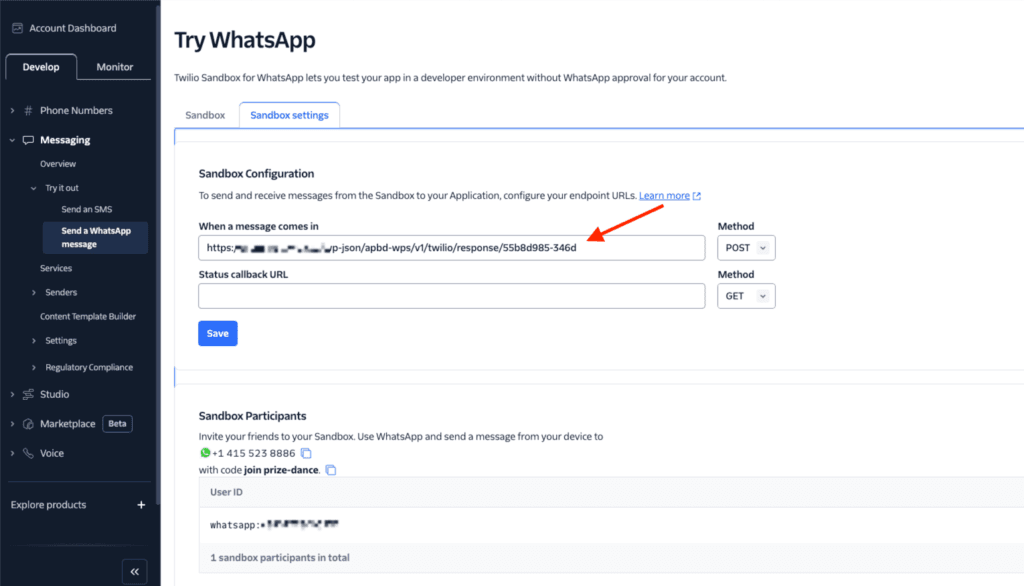
Step 4.3: Add Webhook URL to Twilio Sandbox
- Go to Twilio Sandbox Settings.
- Paste the Webhook URL in the When a Message Comes In field and save the settings.
Step 5: Add More Agents
- Share the Twilio WhatsApp Number and Sandbox Code with your support agents.
- Agents can join the Sandbox by sending the code via WhatsApp.
- Ensure each agent’s WhatsApp number is added to their profile in Support Genix.

Using WhatsApp for Ticket Notifications
- Agents will receive WhatsApp messages for ticket events, including:
- Ticket Created
- Ticket Replied
- Ticket Assigned
- 💡 Replying to Tickets: Start your message with
##ticket_id##(e.g.,##3##) followed by your response.