General Settings in Support Genix
Support Genix’s General Settings section provides powerful tools to configure and customize your support system. From managing ticket pages, file uploads, reCAPTCHA security, and ticket statuses to adding branding and custom styling, this section ensures full flexibility for your support workflow.
Access General Settings
- Go to your WordPress Dashboard.
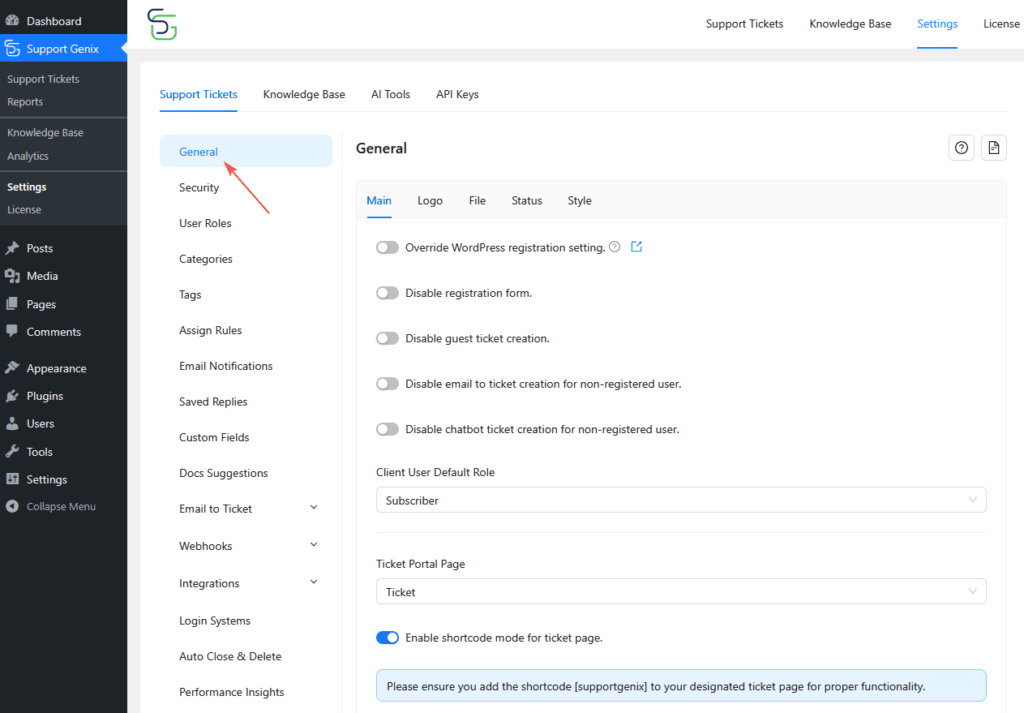
- Navigate to Support Genix > Settings > General.
- The General Settings page has six main tabs:
- Main
- Logo
- File
- reCAPTCHA (v3)
- Status
- Style

Main Tab
The Main Tab includes general settings for tickets, customer roles, and behavior configurations.
Client Role

Select the default role assigned to customers when they submit a ticket (e.g., Subscriber).
Ticket Page
When the Support Genix plugin is activated, a default ticket page is automatically created and assigned as the ticket submission page.
If you want to create and assign a custom ticket page:
- Go to Pages > Add New.
- Name the page (e.g., “Ticket” or “Support”) and publish it.
- Go to Support Genix > Settings > General > Main > Ticket Page, and select your newly created page.
Shortcode Option:
If you prefer to use a shortcode for the ticket form, enable the Shortcode Mode option.
- Use the shortcode
[ supportgenix ](remove spaces inside brackets) on any page to display the ticket submission form.
📖 Refer to our detailed guide here: How to Use Shortcode.

App Loader Text
Customize the loading message that users see while the system processes their request.

Footer Copyright Text
Enter custom text for the footer copyright. 📖 Refer to our guide: Manage Footer Copyright.
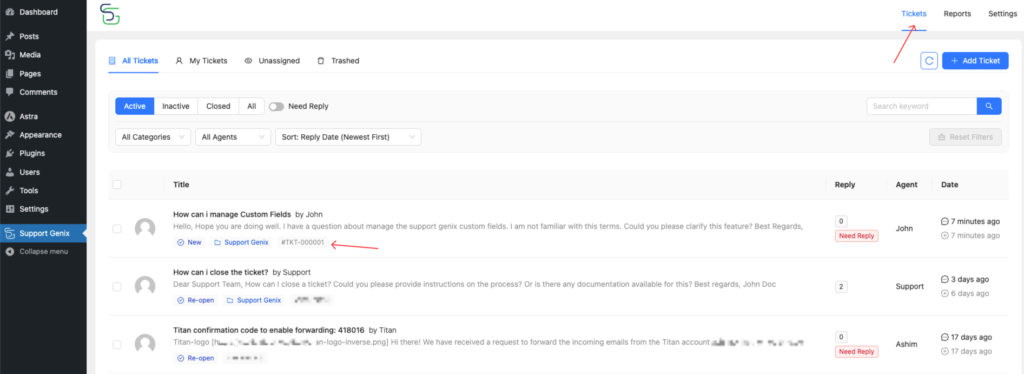
Enable Sequential Ticket Track ID
Activate sequential ticket IDs with the ability to set:
- Prefix (e.g., “TKT-“)
- Length (e.g., 6 digits).

Where will the Ticket Track ID appear?
The Ticket Track ID is displayed on both the Tickets List page and the Ticket Details page. It helps you easily identify and manage individual tickets within the system.
Additional Notes:
- On the Tickets List page, the Ticket Track ID is shown next to each ticket title.
- On the Ticket Details page, the Ticket Track ID is located at the top right corner.
Reference Screenshots:

#TKT-000001)
Additional Options
Enable Auto Ticket Close for inactive tickets.Enable/Disable Public Ticket Options for both ticket creation and details.Control visibility of ticket-related options:
- Hide ticket details
- Disable guest ticket creation
- Auto-scroll to latest replies
Logo Tab
The Logo Tab lets you manage branding and visual assets.
Key Options in Logo Tab:
- App Icon: Upload the favicon for the Support Genix ticket page. This icon will appear in the browser tab and enhance your brand’s visibility and recognition.
- App Logo: Upload the main logo displayed on the front-end ticket page.
- Enable App Loader: Add a custom image or animation for the loading screen.
- Dashboard Image: Upload an image to personalize your admin dashboard.
- Client & Registration Page Image: Customize the image shown on the client login or registration pages.

How to Manage File Upload Settings
The File Tab controls file upload settings for ticket attachments.
Key Options in File Tab:
- Enable File Upload
- Turn this ON to allow customers to upload files while submitting tickets.
- Max File Size
- Set the maximum file upload size (e.g., 20 MB).
- Allowed File Types
- Define permissible file formats:
- Photos: JPG, JPEG, PNG, GIF, WEBP
- Documents: DOC, DOCX, XLS, PDF
- Text Files: TXT, CSV
- Archives: ZIP
- JSON Files
- Define permissible file formats:

reCAPTCHA (v3) Tab
The reCAPTCHA Tab enhances security by preventing spam and bots.
Key Options in reCAPTCHA Tab:
- Enable reCAPTCHA
- Activate Google reCAPTCHA to add a security layer.
- Site Key & Secret Key
- Add your Google reCAPTCHA credentials (site key and secret key).
- Display Options
- Enable reCAPTCHA for:
- Login Form
- Ticket Submission Form
- Registration Form
- Enable reCAPTCHA for:

Status Label Tab
The Status Tab allows you to manage and customize ticket statuses.
Key Options in Status Tab:
- Rename the following status labels:
- New
- Active
- Inactive
- Closed
- In-progress
- Re-open
- Trashed
- These labels can be updated to suit your workflow.

Style Tab
The Style Tab provides options to align the support system’s design with your brand.
Key Options in Style Tab:
- Primary Brand Color: Choose the main color for your branding (e.g., green).
- Secondary Brand Color: Select the accent color for buttons and highlights.
- Custom CSS: Add your own CSS to customize the layout, colors, and appearance further.
