Boost Productivity with Saved Replies in Support Genix
Saved Replies help support agents respond quickly to repetitive queries by allowing them to save common responses. For example, after resolving a ticket, an agent can use a pre-saved reply to request customer feedback. This feature saves time, ensures consistent communication, and improves productivity.
Benefits
✅ Boost agent productivity with pre-saved replies.
✅ Save time by reusing common responses.
✅ Edit, delete, or disable saved replies as needed.
✅ Utilize Dynamic Placeholders for personalized messaging.
How to Use
Step 1. Access Saved Replies
- Go to your WordPress Dashboard.
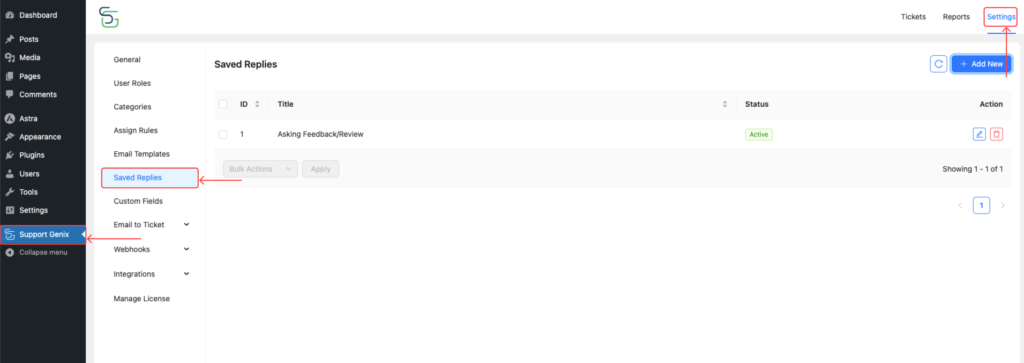
- Navigate to Support Genix > Settings > Saved Replies.

Step 2. Add a New Saved Reply
- Click the “Add New” button.
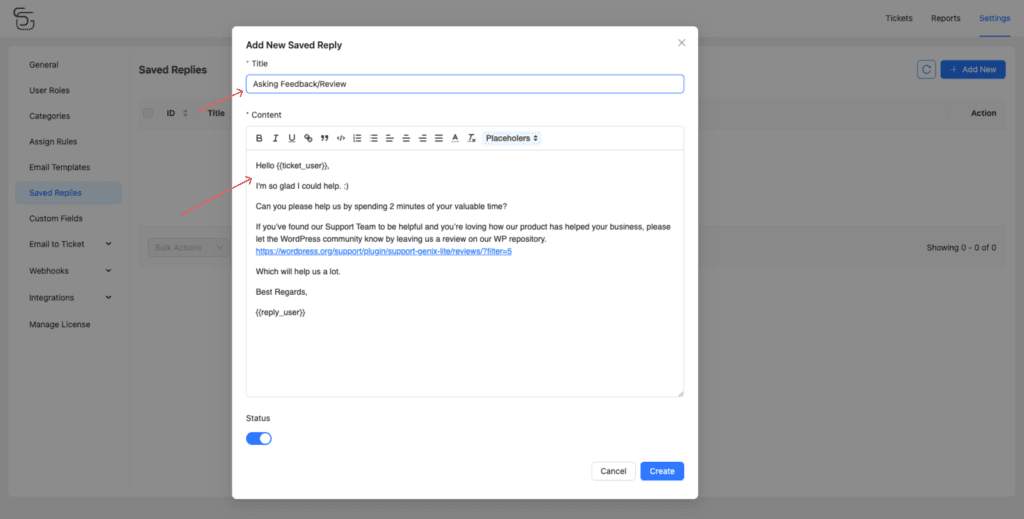
- Fill out the form with the following details:
- Saved Reply Title: For example, “Asking Feedback/Review”.
- Saved Reply Content: Add the necessary response text. Use Dynamic Placeholders for personalization.
- Status: Toggle ON to activate the saved reply. Set to OFF to temporarily disable it.
- Click “Create” to save the reply.

Step 3. Dynamic Placeholders
Dynamic placeholders can be inserted into your saved reply content for personalized responses. Here is the list of placeholders:
{{site_name}}– Website name{{site_url}}– Website URL{{ticket_user}}– Ticket creator’s name{{ticket_title}}– Ticket title{{reply_user}}– Name of the user replying{{reply_user_grp}}– Role of the replying user (e.g., Agent, Manager)
Step 4. Edit or Delete Saved Replies
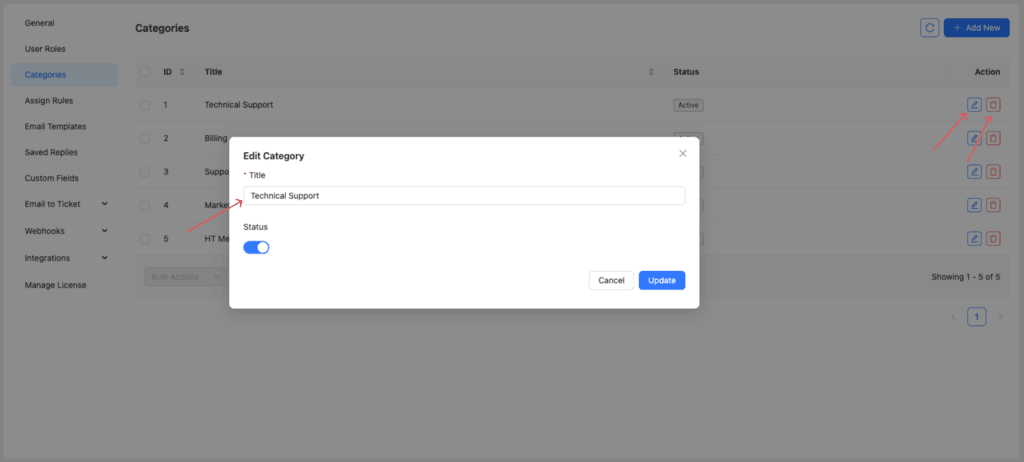
- To Edit a saved reply: Click the Edit icon next to the saved reply you want to update.
- To Delete a saved reply: Click the Delete icon to remove it.

Step 5. Bulk Select and Actions
- Select multiple saved replies using the checkboxes.
- From the Bulk Actions dropdown, choose:
- Activate: Enable the selected replies.
- Deactivate: Disable the selected replies.
- Delete: Remove the selected replies.
- Click Apply to execute the action.
For example, if you are not using a saved reply, you can deactivate or delete it using bulk actions.

Step 6. Where to Use Saved Replies
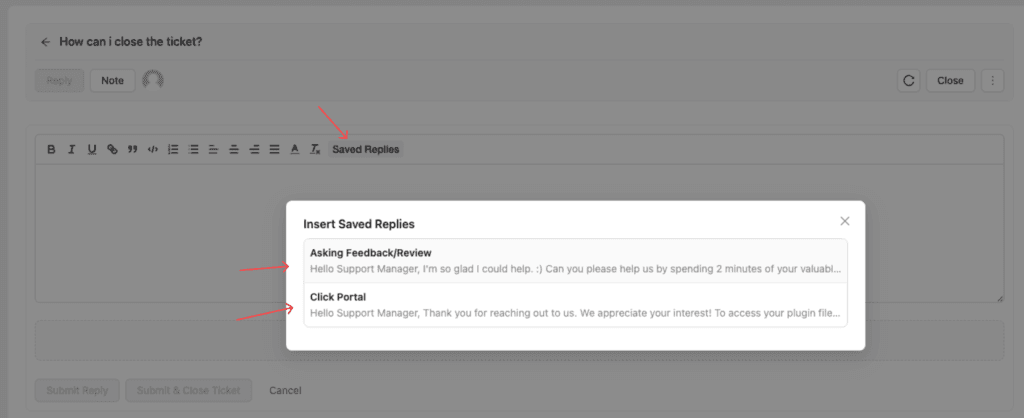
When agents or managers are replying to tickets, they will see a “Saved Replies” option in the editor header. Simply select the appropriate saved reply to insert it into the message.

Pro Tip💡
Utilize dynamic placeholders to personalize saved replies and deliver more professional, customized responses to customers.