Ticket Assignment Rules in Support Genix
Efficiently assign new tickets to roles or agents based on categories in Support Genix. By automating ticket delegation, you ensure smooth management while maintaining control over ticket workflows.
Benefits
✅ Assign tickets to specific roles or agents for better delegation.
✅ Automate task management based on ticket categories.
✅ Notify agents instantly for prompt action.
✅ Perform bulk actions to activate, deactivate, or delete rules.
How to Use
Step 1. Access Assign Rules
- Go to your WordPress Dashboard.
- Navigate to Support Genix > Settings > Assign Rules.

Step 2. Add a New Rule
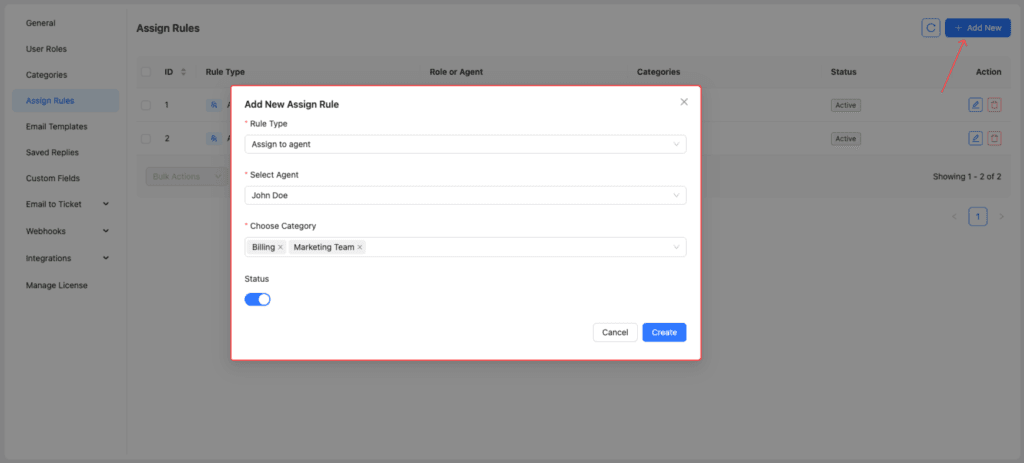
- Click on “Add New”.
- Configure the following options:
- Rule Type:
- Assign to Role: Assign the ticket to a specific role.
- Assign to Agent: Assign the ticket to a specific agent.
- Notify Agent: Send notifications to the assigned agent.
- Select Role/Agent:
- If Assign to Role: Choose a specific role.
- If Assign to Agent or Notify Agent: Choose a specific agent.
- Choose Category: Select one or multiple categories to apply the rule.
- Status: Toggle the Status ON to activate the rule.
- Rule Type:
- Click “Create” to save the rule.

Step 3. Modify or Delete a Rule
- To Edit: Click the Edit icon (pencil) next to the rule.
- To Delete: Click the Delete icon (trash bin) to remove a rule.

Step 4. Bulk Select and Actions
- Select multiple rules using the checkboxes.
- From the Bulk Actions dropdown, choose one of the following:
- Activate
- Deactivate
- Delete
- Click “Apply” to execute the selected action.

Pro Tip💡
Need to create categories for assigning rules? Follow our detailed guide: Manage Ticket Category Documentation.
Last updated on October 7, 2025