How to create a ticket page
Creating a ticket page in Support Genix is straightforward. Follow the updated steps to create and configure your ticket page. This documentation aligns with the updated Support Genix dashboard and includes user-friendly instructions and SEO-optimized content.
Benefits of Creating a Ticket Page
- 🖥️ Centralized Support Hub: A dedicated ticket page streamlines customer support communication.
- 🌐 SEO Optimization: Customizable ticket pages can enhance your website’s search engine visibility.
- 🔒 Privacy: Blank pages ensure secure and private support ticket management.
- 📄 Flexibility: Customizable options let you match the ticket page design with your website’s theme.
- 🔧 Ease of Use: Quick configuration allows seamless integration with Support Genix.
Step 1: Create a New Ticket Page
- Navigate to WordPress Dashboard > Pages > Add New.
- Provide a suitable title like Ticket, Help, or Support, and click Publish.
- 🚫 Important Note: No need to add any shortcode or content to the page. Keep it blank.
Step 2: Configure the Ticket Page in Support Genix
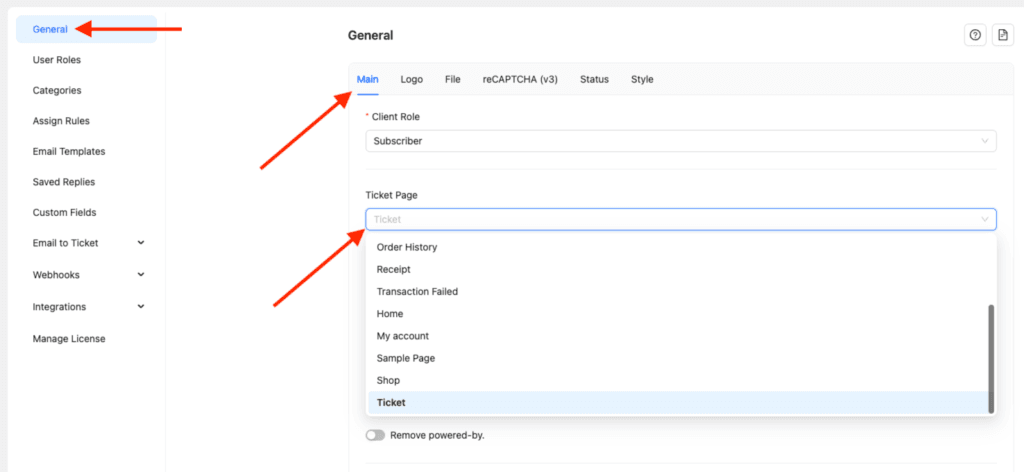
- Go to Support Genix > Settings > General > Main > Ticket Page.
- Select the page you created in Step 1 from the dropdown menu.
- Save your changes.

Optional: Customizing the Ticket Page Design
If you prefer to maintain your website’s header/footer style for the ticket page:
- You can create a custom-designed ticket page using shortcodes.
- Refer to this documentation for more details: How to Use Shortcode.
Key Notes
- Support Genix automatically creates a default ticket page upon installation.
- You can create an additional custom page and configure it as your ticket page anytime.
- For detailed guidance, refer to our dedicated support resources.
If you need further assistance, feel free to reach out! 🎉
Last updated on October 8, 2025
Was this article helpful?
Powered by Support Genix