How to Set Up the “Write With AI” to Create Knowledge Base Articles
The Write With AI feature in Support Genix helps you generate high-quality Knowledge Base articles more efficiently by integrating powerful artificial intelligence tools. Designed for content creators, support agents, and admins, this feature streamlines the process of drafting, refining, and publishing help documentation—right from within the Support Genix dashboard. You can choose between two leading AI providers, OpenAI and Claude, to assist in producing clear, accurate, and SEO-optimized content. With just a few configuration steps, you can harness the power of AI to accelerate your documentation workflow, maintain a consistent writing style, and deliver better self-service support to your users.
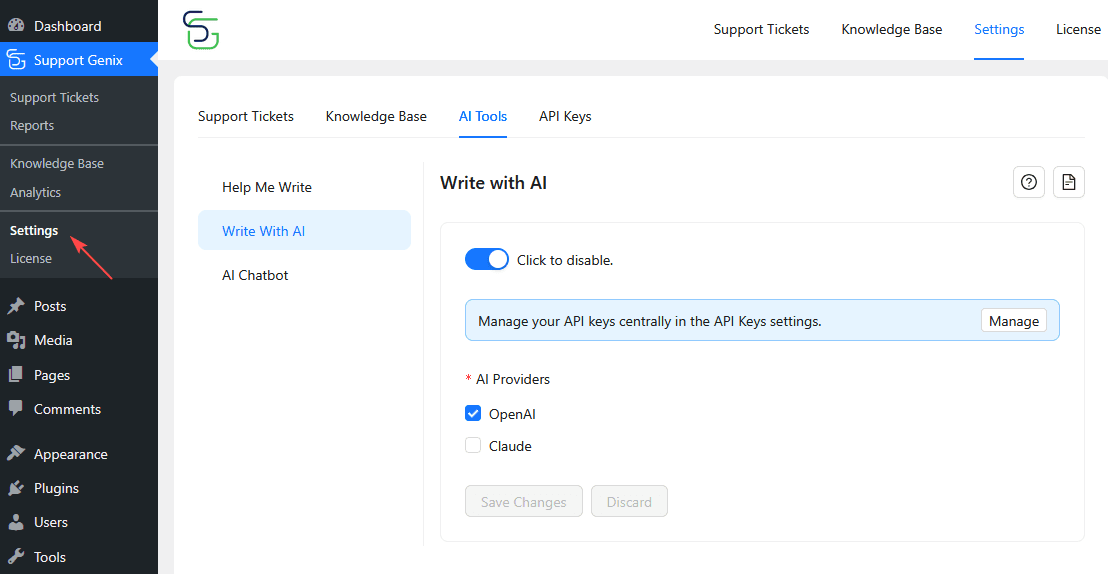
Accessing Write With AI Settings
- Go to SupportGenix → Settings → AI Tools
- Open Write With AI
- Toggle Write With AI to Active
- Select one or both AI providers:
- OpenAI
- Claude
- Click Save Changes
Tip: You can enable both providers and switch between them anytime.
Note:
AI providers are enabled from the AI Tools tab, while API keys are managed separately under API Keys. This allows centralized key management across SupportGenix features.
Configure API Keys
SupportGenix manages all AI provider API keys from a centralized settings page.
You only need to complete this setup once.
- Go to SupportGenix → Settings → API Keys
- Choose the AI provider you enabled:
- OpenAI
- Claude
- Follow the global guide to add and save your API key
👉 Configure API Keys in Support Genix: How to Configure API Keys in SupportGenix
⚠️ AI features will not work until at least one API provider is properly configured.
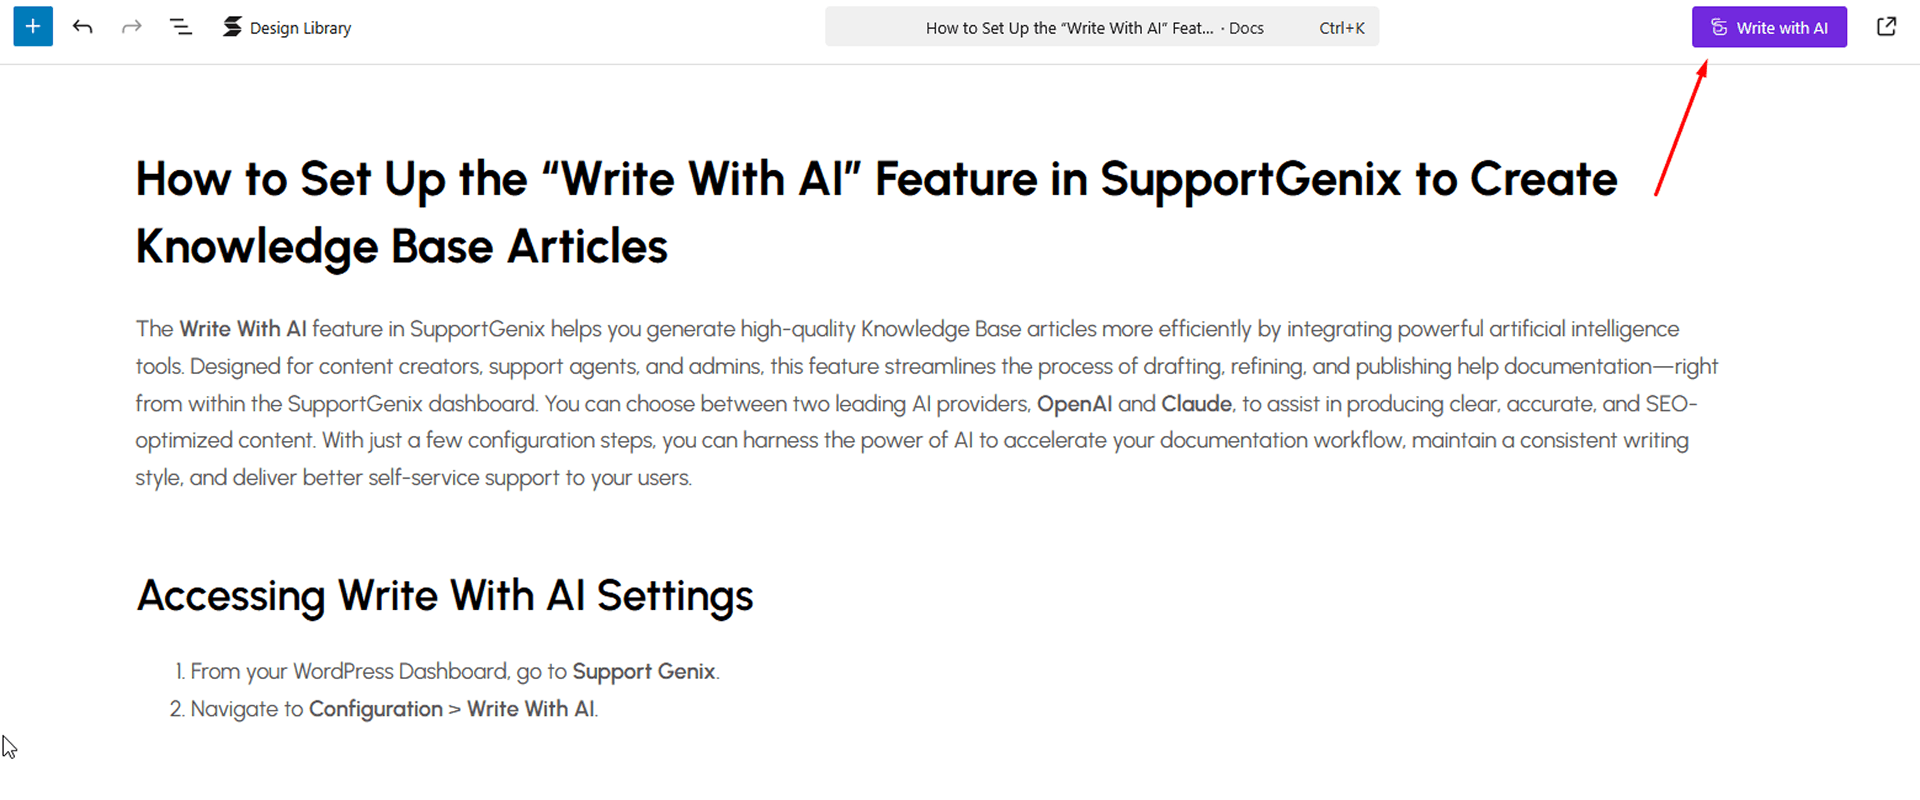
Where to Find Write with AI Button
While editing your documentation, you’ll find the Write with AI button at the top of the article editor.
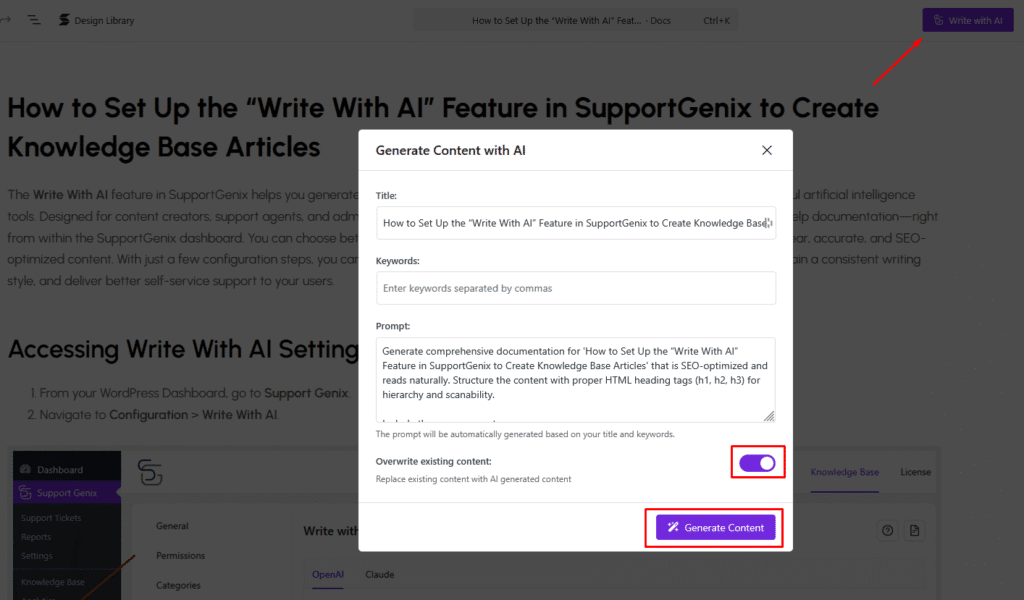
Create Content Using the Write With AI
After clicking the Write with AI button, a popup titled “Generate Content with AI” will appear, allowing you to configure and generate your documentation using AI.
Here’s what each field does:
- Title: This field is auto-filled based on your current doc title.
- Keywords: Optionally enter comma-separated keywords to guide AI generation for SEO optimization.
- Prompt: A default prompt is automatically generated using the title and keywords, but you can modify it for a specific output style or structure.
- Overwrite Existing Content: Toggle this switch on if you want the generated content to replace what’s already in your document.
Once configured, click the Generate Content button to insert the AI-generated draft into your article.
Refer to the screenshot below for a better understanding of the modal layout.
Last updated on March 15, 2026
Was this article helpful?
Powered by Support Genix