How to Migrate from Fluent Support to Support Genix
The Migrations feature in Support Genix lets you seamlessly transfer your support tickets and related data from Fluent Support. This guide walks you through each step of the process, covering key requirements and important considerations to ensure a smooth and successful transition.
⚠️ Important Notes Before Migration
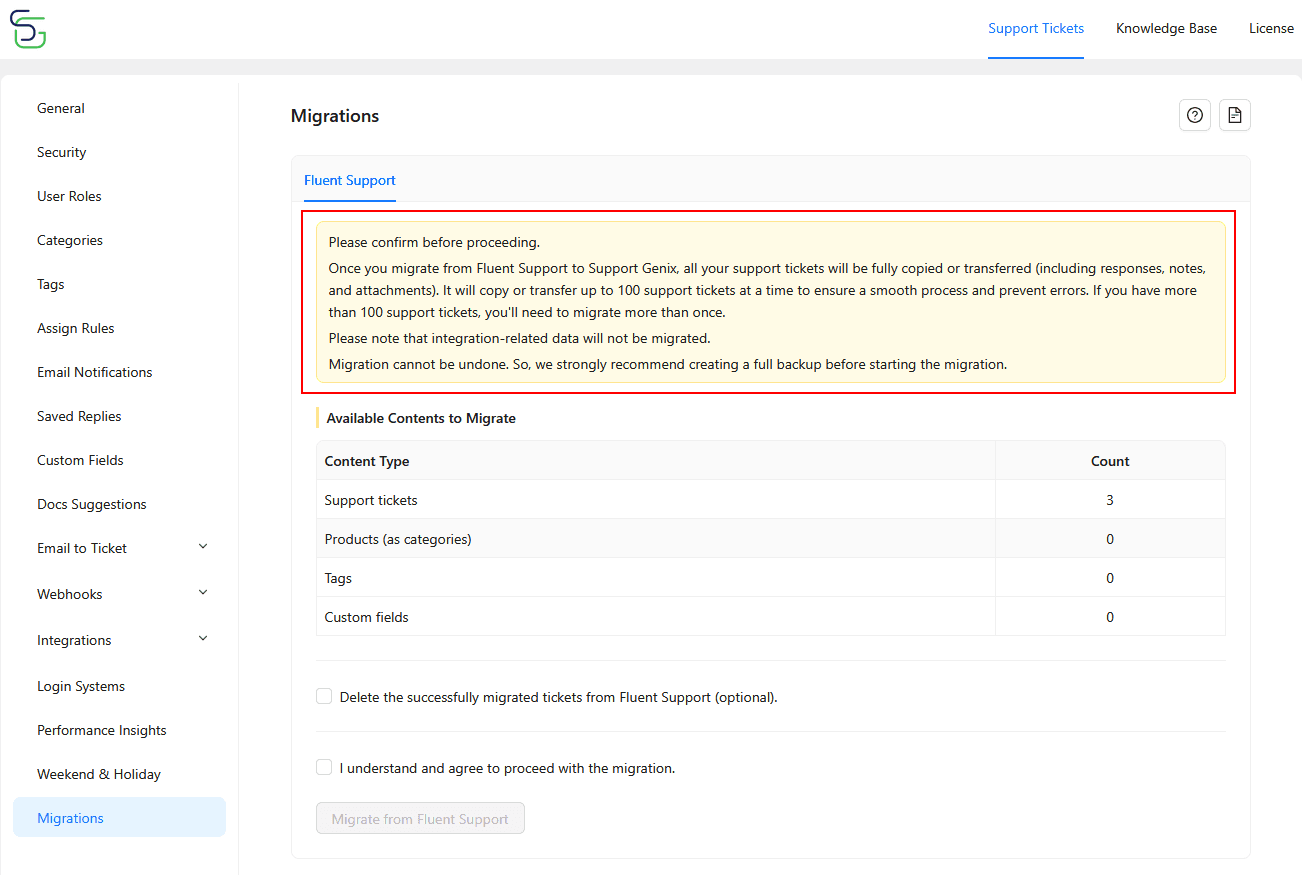
- Migration supports up to 100 support tickets at a time. If you have more, repeat the process.
- Only ticket-related content is migrated (support tickets, tags, categories, and custom fields).
- Integration data will not be migrated.
- Migration cannot be undone. It’s highly recommended to create a full site backup before proceeding.
Supported Migration Content
You can migrate the following from Fluent Support:
- Support Tickets: Includes all tickets, notes, responses, and attachments
- Products (as Categories): Will appear as categories in SupportGenix
- Tags: Ticket-related tags
- Custom Fields: Custom fields used in ticket forms
Important Note on Email Configuration
To migrate tickets and ensure proper system functionality:
- The email address used in Fluent Support must also be configured as a mailbox in SupportGenix.
- You can use either the Modern or Traditional email method.
- Make sure the mailbox is active and connected using the same email.
- Fluent Support connected with:
youremail.com - In SupportGenix, you must set up a mailbox (Modern/Traditional) using the same address.
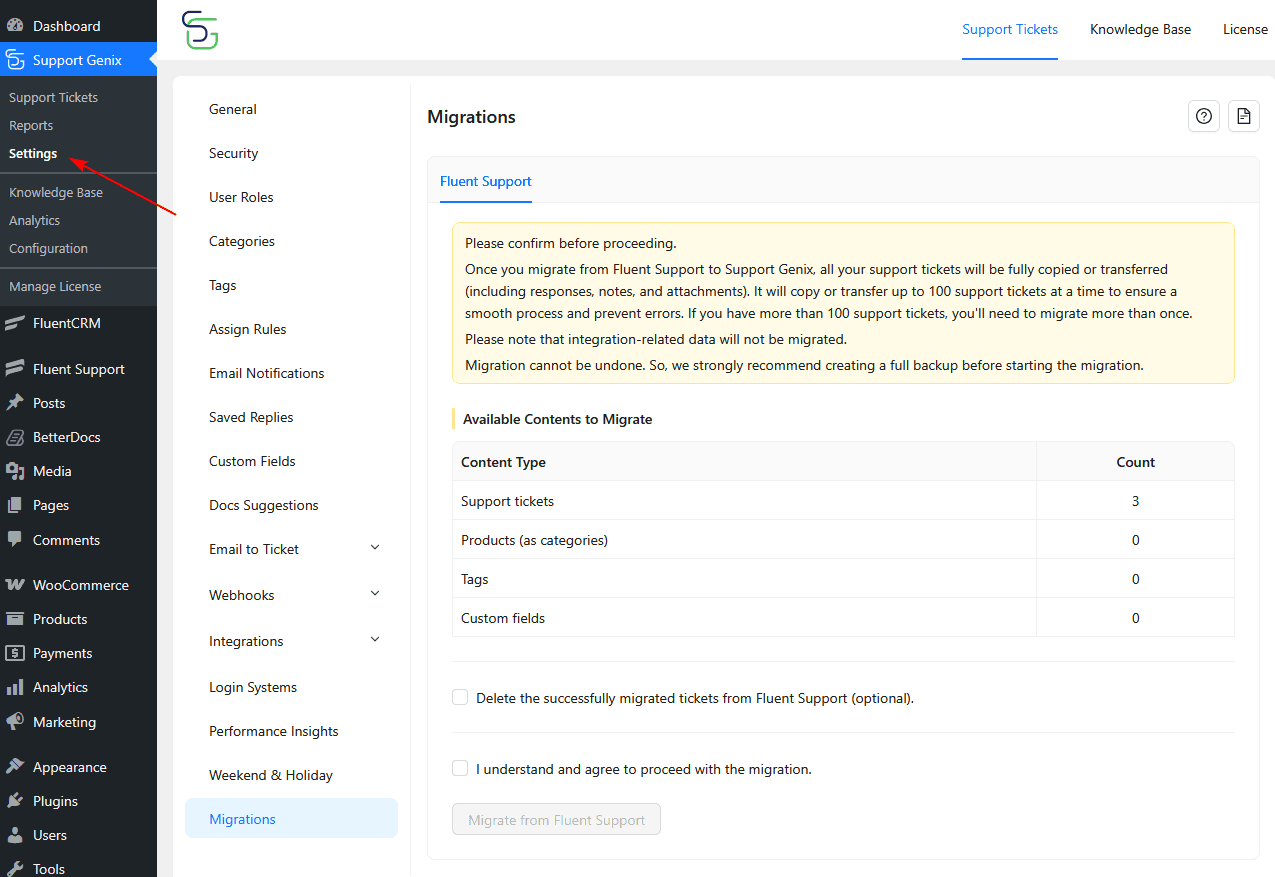
Step 1: Open the Migrations Panel
- From your WordPress dashboard, go to Support Genix → Settings → Migrations.
- Click the Fluent Support tab.
Step 2: Carefully Review the Migration Warning
Read the warning carefully. It will state: “Migration is irreversible. We highly recommend creating a full backup before proceeding.”
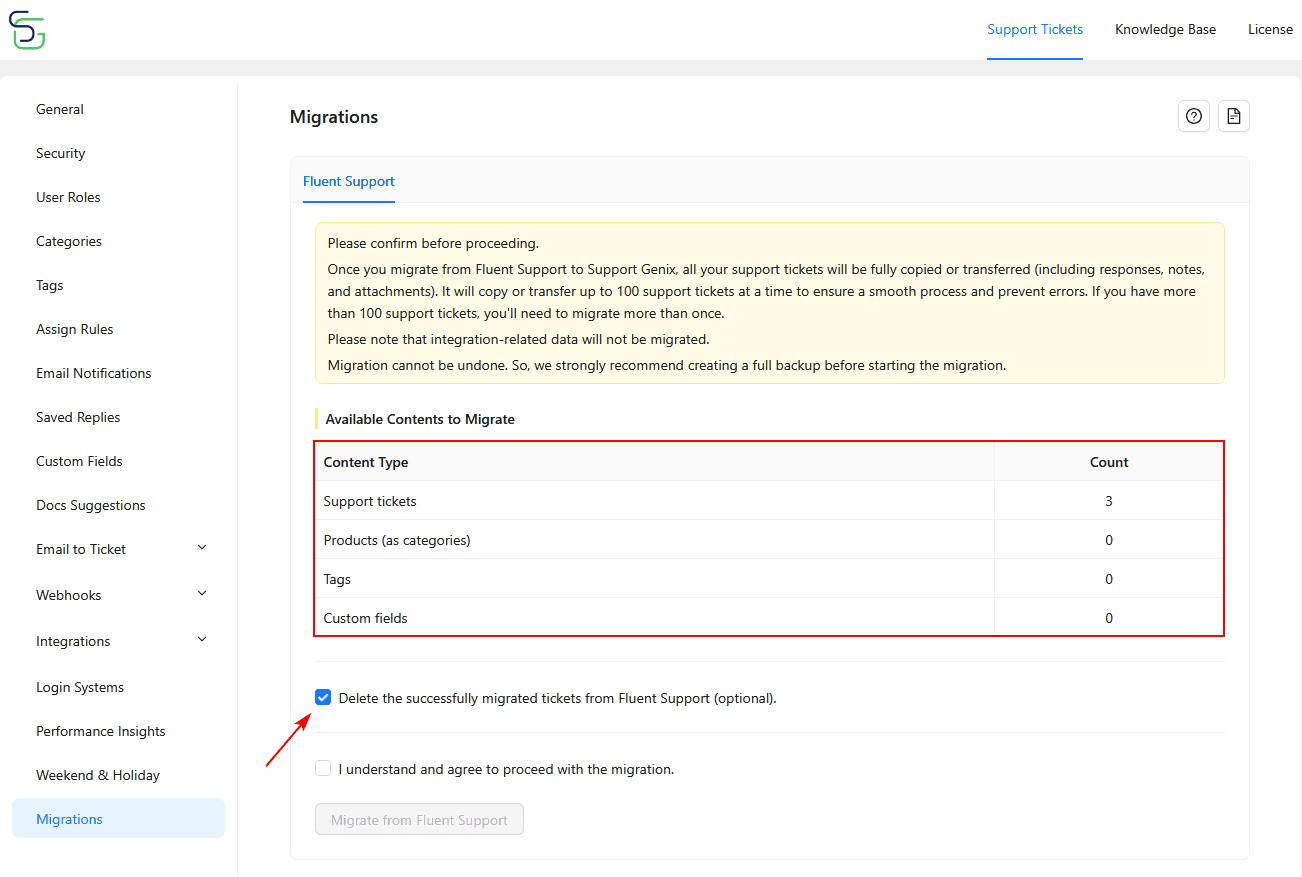
Step 3: Review Available Content for Migration
Review the available content to migrate from Fluent Support to SupportGenix:
- Support Tickets
- Products (as Categories)
- Tags
- Custom Fields
You can also optionally check: Delete the successfully migrated tickets from Fluent Support (after verification).
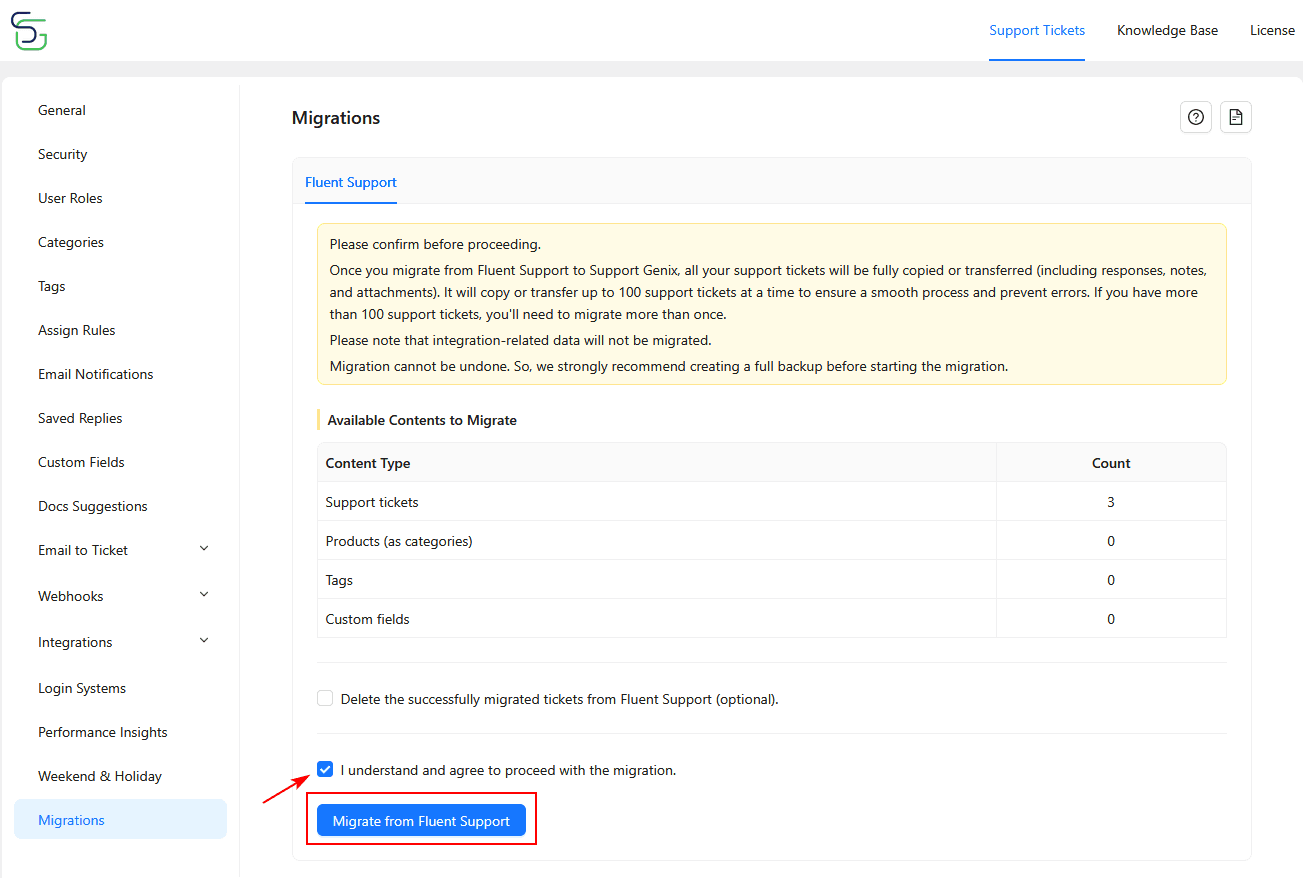
Step 4: Confirm the Migration (Agree to Proceed)
- Check the box: “I understand and agree to proceed with the migration.”
- Click the Migrate from Fluent Support button to begin.
Verifying the Migration
Once migration is done:
- Navigate to the Support Tickets section in SupportGenix.
- Verify that the transferred tickets are displaying properly.
- Confirm that tags, categories, and custom fields (if selected) are also available.
Troubleshooting Tips
If tickets aren’t showing:
- Double-check the connected mailbox email.
- Ensure the email forwarding is correctly set up.
- Confirm you didn’t skip the agreement checkbox.
Recheck if you need to perform multiple migrations due to ticket volume.
You’re All Set!
Your Fluent Support tickets and related data should now be successfully migrated to SupportGenix. If you need help with mailbox configuration or email forwarding, refer to the Documentations (link to be added).
Last updated on March 5, 2026
Was this article helpful?
Powered by Support Genix